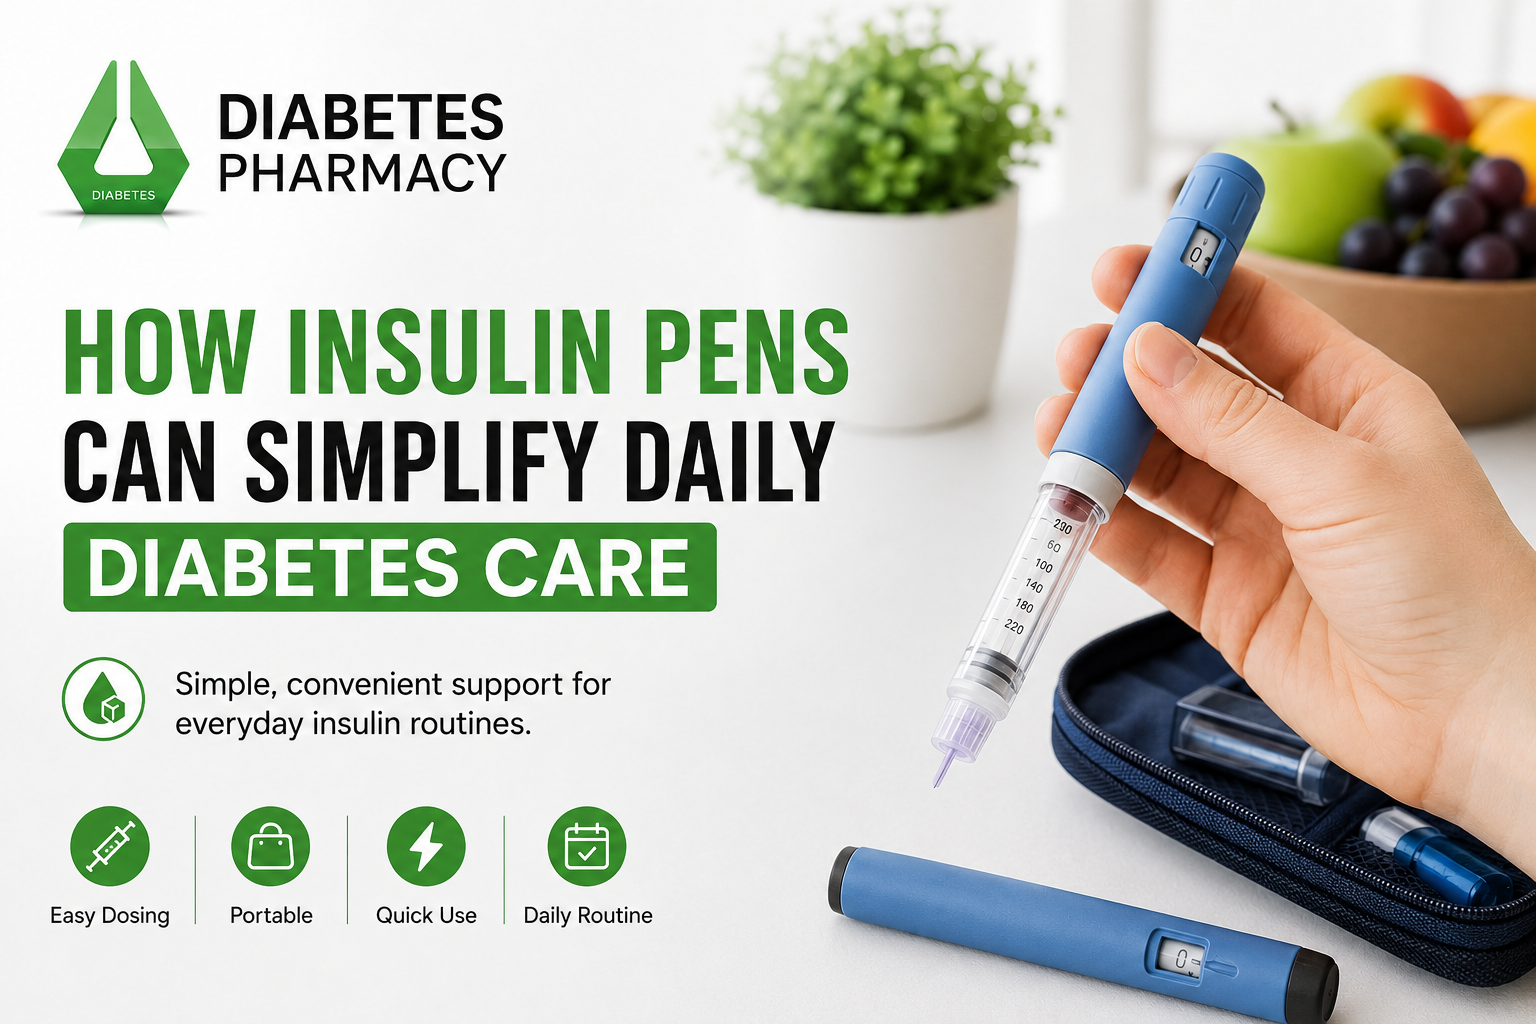
How Insulin Pens Can Simplify Daily Diabetes Care

Insulin pens can make daily insulin administration simpler, more convenient, and discreet. They allow users to select their prescribed dose easily and carry their insulin supplies with less hassle. For people who regularly use insulin, choosing a suitable pen can help create a more comfortable and consistent daily routine.

What Are Insulin Pens?

Insulin pens are injection devices designed to deliver insulin under the skin. They generally consist of a pen body, insulin cartridge or prefilled insulin supply, dose-setting mechanism, and a compatible disposable pen needle.

Unlike a traditional vial-and-syringe system, an insulin pen allows the user to select a prescribed dose directly on the device. Depending on the type of pen, doses can be adjusted using a dial before injection.

Pens are available in different designs. Some are disposable and come prefilled with insulin, while reusable models are designed to work with replaceable insulin cartridges. The correct choice depends on the insulin prescribed, personal preferences, and advice from a healthcare professional.

Easier Dose Selection

One of the main advantages of many insulin pens is their straightforward dose-setting mechanism. Instead of drawing insulin from a vial using a syringe, users can select the prescribed amount using the pen’s dose dial.

For example, the HumaPen Savvio available from Diabetes Pharmacy is an insulin delivery device designed for use with Lilly Humalog or Humulin 3 mL cartridges. According to the product information, it can deliver up to 60 units per injection and is compatible with BD insulin pen needles.

Users should always follow their prescribed insulin dose and the instructions supplied with their specific device. An insulin pen should not be used to determine an appropriate dose independently.

Convenient for Daily Routines

Daily diabetes care can involve several tasks, so convenience matters. Insulin pens are generally compact and can be easier to carry than a separate vial and syringe. This can make insulin administration more practical at work, while travelling, or during other everyday activities.

A reusable pen can also reduce the need to carry a new injection device every time insulin is required. Instead, the appropriate cartridge is loaded into the reusable pen according to the manufacturer’s instructions.

For people who have an established insulin routine, having a familiar device may make injections feel more manageable and easier to incorporate into daily activities.

Discreet Insulin Administration

Some people feel uncomfortable administering insulin in public. Insulin pens are designed in a compact format, which can make them more discreet than carrying a vial and syringe.

Their pen-like appearance and simple operation can allow users to manage prescribed injections with less equipment. However, privacy and convenience should never take priority over correct injection technique or safe insulin handling.

If someone is unsure about using a pen outside the home, a healthcare professional or diabetes educator can provide practical guidance.

Reusable Options and Cartridge Compatibility

Along with choosing a suitable insulin delivery device, having reliable diabetes care supplies can make daily management more convenient. The Diabetes Pharmacy shop offers a range of products for blood glucose monitoring and insulin delivery, including test strips, glucose meters, lancets, sensors, and insulin pens. For people prescribed compatible Lilly insulin cartridges, the HumaPen Savvio Insulin Pen is a reusable device designed for Lilly Humalog or Humulin 3 mL cartridges and is compatible with BD insulin pen needles.

Helpful for People on the Go

An insulin routine does not stop when someone leaves home. Work, shopping, holidays, social occasions, and other activities can all require people to manage their diabetes away from their usual environment.

The compact design of insulin pens can make them easier to carry as part of a diabetes care kit. Depending on the insulin and device, users may need to consider temperature, storage conditions, spare supplies, and safe disposal of used needles.

When travelling, keeping insulin and essential diabetes supplies properly stored is particularly important. People should follow the storage instructions for their specific insulin and carry enough supplies for their trip.

Supporting Consistency

Consistency is an important part of diabetes management. Using a familiar insulin delivery device may help some people establish a predictable routine around their prescribed injections.

However, an insulin pen is only one part of diabetes care. Blood glucose monitoring, medication adherence, nutrition, physical activity, appointments, and individual treatment goals all contribute to overall management.

Diabetes Pharmacy’s resources also emphasise the importance of structured daily routines and reliable access to appropriate diabetes supplies.

Important Safety Considerations

Insulin pens should always be used according to the manufacturer’s instructions and a healthcare professional’s advice. Never change an insulin dose simply because a blood glucose reading is higher or lower than expected unless your prescribed diabetes management plan tells you how to respond.

Use only the insulin cartridge specified for the pen. Check the insulin before use and follow the storage requirements provided with the medication.

A new compatible pen needle should generally be used for each injection according to professional and manufacturer guidance. Used needles should be disposed of safely in an appropriate sharps container rather than being left loose in household waste.

If a pen appears damaged, does not work correctly, or the dose mechanism behaves

Choosing a Suitable Device

The best insulin delivery device is not necessarily the one with the most features. Practical considerations include compatibility with prescribed insulin, dose range, ease of handling, portability, needle compatibility, availability of replacement cartridges, and personal comfort.

Reusable devices may appeal to people who prefer a durable pen body and cartridge-based insulin delivery. Disposable pens may be more convenient for others because the entire device is replaced after the insulin supply is finished.

A healthcare professional or pharmacist can help determine which option is appropriate based on the individual’s insulin prescription and needs.

Combining Delivery With Monitoring

Effective diabetes care involves more than insulin administration. Monitoring blood glucose can help people and their healthcare teams understand patterns and assess whether the current treatment plan is working as intended.

Diabetes Pharmacy’s online shop includes several monitoring options, such as blood glucose meters, test strips, lancets, and continuous glucose monitoring products.

The right combination of monitoring and insulin delivery products depends on the person’s treatment plan. People using insulin should discuss their monitoring schedule and target ranges with their healthcare professional rather than relying on general online recommendations.

Conclusion

Insulin pens can make insulin administration more convenient and manageable as part of a daily routine. Choosing a compatible device, following proper usage instructions, and maintaining safe insulin practices are essential. With suitable products and support from Diabetes Pharmacy, users can better organize their everyday diabetes care.

FAQs

1. What is an insulin pen?
An insulin pen is a device used to administer insulin under the skin.

2. Are insulin pens reusable?
Some pens are reusable and use replaceable insulin cartridges, while others are disposable.

3. Can every insulin cartridge work with every pen?
No. Insulin cartridges must be compatible with the specific pen and prescribed insulin.

4. Are insulin pens easy to carry?
Yes. Their compact design can make them convenient for everyday use and travel.

5. Can I change my insulin dose myself?
Only follow the dose instructions provided by your healthcare professional or your prescribed diabetes management plan
Share:

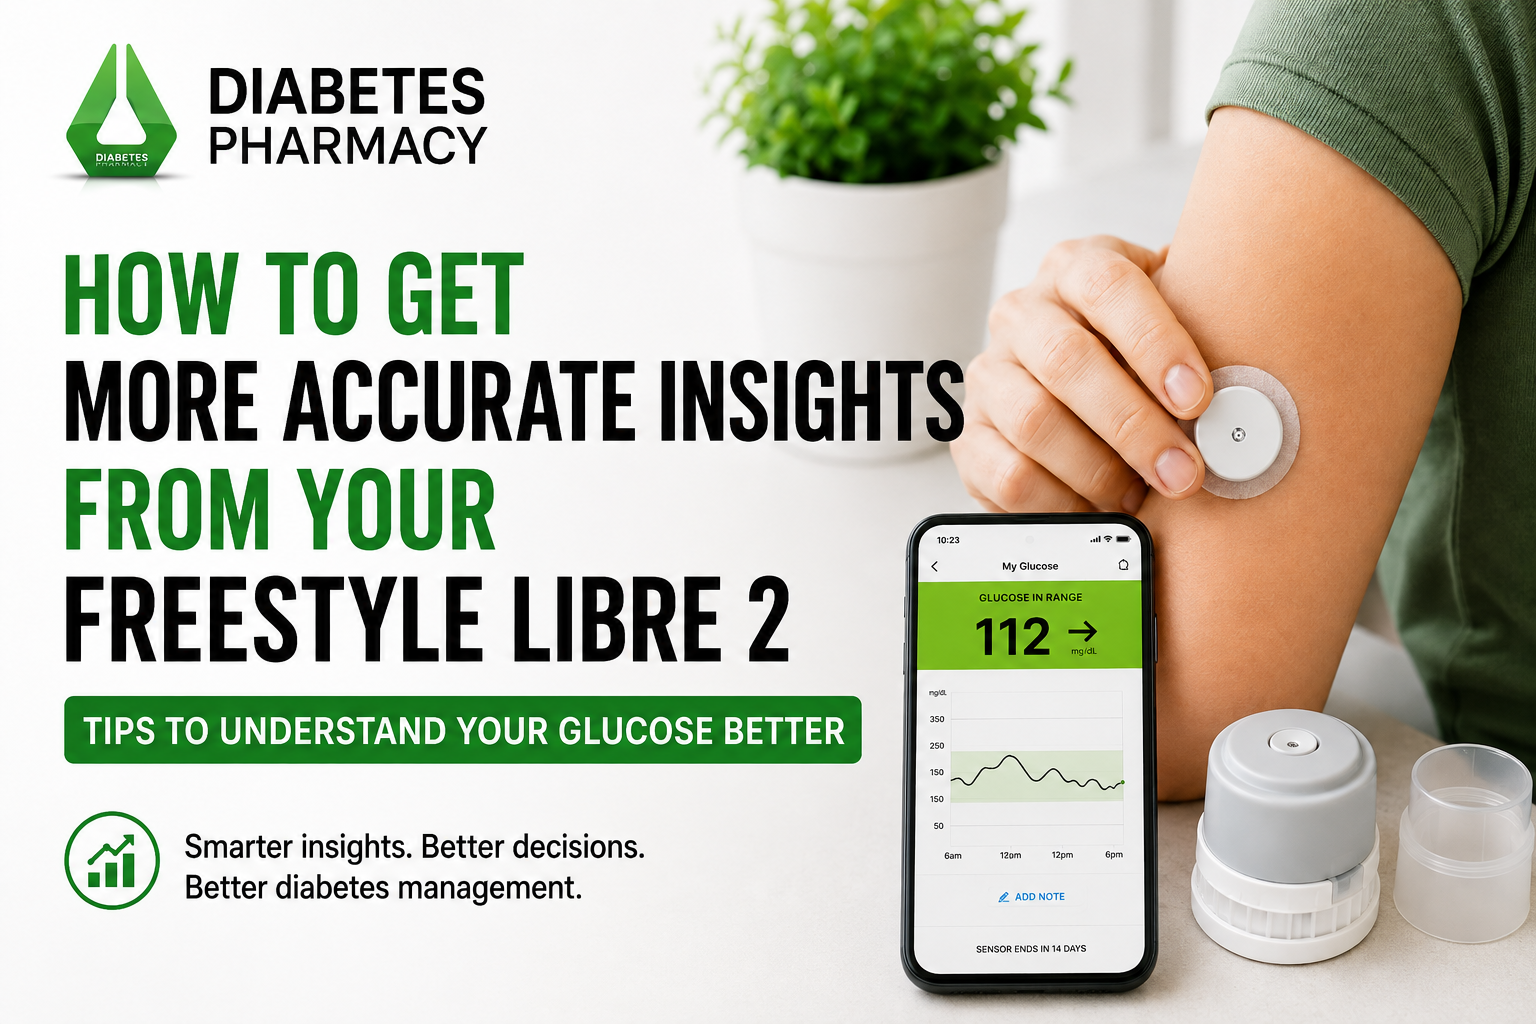
How to Get More Accurate Insights From Your FreeStyle Libre 2

FreeStyle Libre 2 plus can help people with diabetes understand how glucose levels change. Instead of relying only on occasional finger-prick tests, the sensor provides glucose information that can reveal patterns connected with meals, exercise, sleep, stress, and medication. Getting useful information from the system requires more than checking a single number. To gain accurate insights, understand how the sensor works, follow trends over time, and use the data alongside medical guidance.

Understand What FreeStyle Libre 2 Measures

FreeStyle Libre 2 Plus measures glucose in interstitial fluid, the fluid surrounding cells under the skin. A traditional blood glucose meter measures glucose directly from blood. Because glucose moves from the bloodstream into interstitial fluid, a short delay can occur between the two readings.

This difference may be more noticeable when glucose is changing quickly, such as after eating, exercising, or treating a low glucose level. Understanding this delay can prevent concern when a sensor reading does not exactly match a finger-prick result.

Pay Attention to Trend Arrows

Trend arrows show whether glucose is rising, falling, or remaining relatively stable. A number alone gives only part of the picture. A reading within your target range may look reassuring, but a downward arrow could show that glucose is falling. An upward arrow may indicate that glucose is increasing after a meal. Reviewing the number together with the trend arrow gives you better context

Focus on Patterns, Not Single Readings

Continuous glucose monitoring provides a large amount of data. It can be tempting to react to every number, but repeated patterns are usually more useful than isolated readings.

Compare glucose levels at similar times each day. Look for patterns after meals, exercise, and overnight. You may notice that certain meals cause repeated rises, activity lowers glucose at particular times, or morning levels are consistently higher. The

Record Meals and Portion Sizes

Food has a major impact on glucose, so keeping simple meal notes can make your sensor data more useful. Record what you eat, approximate portion sizes, and meal times.

Then review how glucose changes during the following hours. Foods containing similar amounts of carbohydrate may affect you differently because fibre, fat, protein, preparation, and portion size can influence the response. Comparing similar meals over several days can help identify which choices are associated with more stable glucose patterns.

Consider Exercise and Daily Activity

Physical activity can affect glucose differently depending on the type and intensity of exercise. Walking, cycling, strength training, and high-intensity workouts may produce different responses.

Recording the timing and type of activity can help you compare exercise with your glucose graph. Over time, this can show when exercise is associated with more stable levels or when additional monitoring may be needed.

Use Time in Range

Time in Range shows the percentage of time your glucose remains within your recommended target range. It can provide a broader picture of glucose management than focusing on a single reading or average.

It can also help identify how much time you spend above or below your target. Your healthcare professional can help determine appropriate targets for your individual needs.

Consider Sleep, Stress, and Illness

Glucose levels are influenced by more than meals and exercise. Poor sleep, stress, illness, infection, routine changes, and some medications can affect glucose.

If your readings look different from usual, consider what else has changed. A stressful week or poor sleep may help explain unexpected patterns even when your diet has stayed similar.

Know When to Confirm With a Blood Glucose Meter

FreeStyle Libre 2 can reduce routine finger-prick testing, but blood glucose checks may still be needed in some situations.

If symptoms do not match the sensor reading, if glucose is changing rapidly, or if the system advises a blood glucose check, follow the device instructions and your diabetes care plan. Never ignore symptoms of significant high or low glucose because the sensor shows a different value.

Use a Trusted Diabetes Pharmacy

Reliable supplies are an important part of glucose monitoring. Purchasing sensors and related products from a trusted diabetes pharmacy can help ensure you receive appropriate products and clear information about storage and handling.

A specialist diabetes pharmacy may also provide access to glucose monitoring supplies that support your prescribed management routine. Always follow professional advice when selecting or changing monitoring equipment.

Conclusion

Getting more accurate insights from FreeStyle Libre 2 means understanding patterns rather than simply collecting numbers. Learn how sensor glucose differs from blood glucose, use trend arrows, track meals and exercise, review Time in Range, and compare reports over several days or weeks.

Also consider sleep, stress, illness, and routine changes when interpreting results. Discuss repeated patterns with your healthcare team before making significant changes to medication, insulin, diet, or treatment.

Used thoughtfully, FreeStyle Libre 2 can provide valuable information that supports better-informed diabetes management and helps you understand how everyday choices affect glucose.

instructions.

Frequently Asked Questions

1. Why does FreeStyle Libre 2 differ from a blood glucose meter?
FreeStyle Libre 2 measures glucose in interstitial fluid, while a blood glucose meter measures glucose directly from blood. A short delay can occur, particularly when glucose is changing quickly.

2. How can I get more reliable FreeStyle Libre 2 readings?
Follow the manufacturer’s application instructions, use the recommended sensor location, keep the skin clean and dry, and focus on trends. Confirm with a blood glucose test when advised.

3. Should I check my glucose after every meal?
Not necessarily. Reviewing glucose before and after selected meals can help you understand how different foods, portions, and meal combinations affect your individual glucose response.

4. What should I do if the sensor reading does not match how I feel?
Follow the device instructions and your diabetes plan. If symptoms do not match the sensor reading, a finger-prick blood glucose test may be required. Seek medical help for severe symptoms.

5. Can FreeStyle Libre 2 reports help my healthcare professional?
Yes. Reports can help identify repeated highs, lows, glucose variability, and other patterns. Treatment decisions should be made with your healthcare team rather than from individual sensor readings alone.

Share:

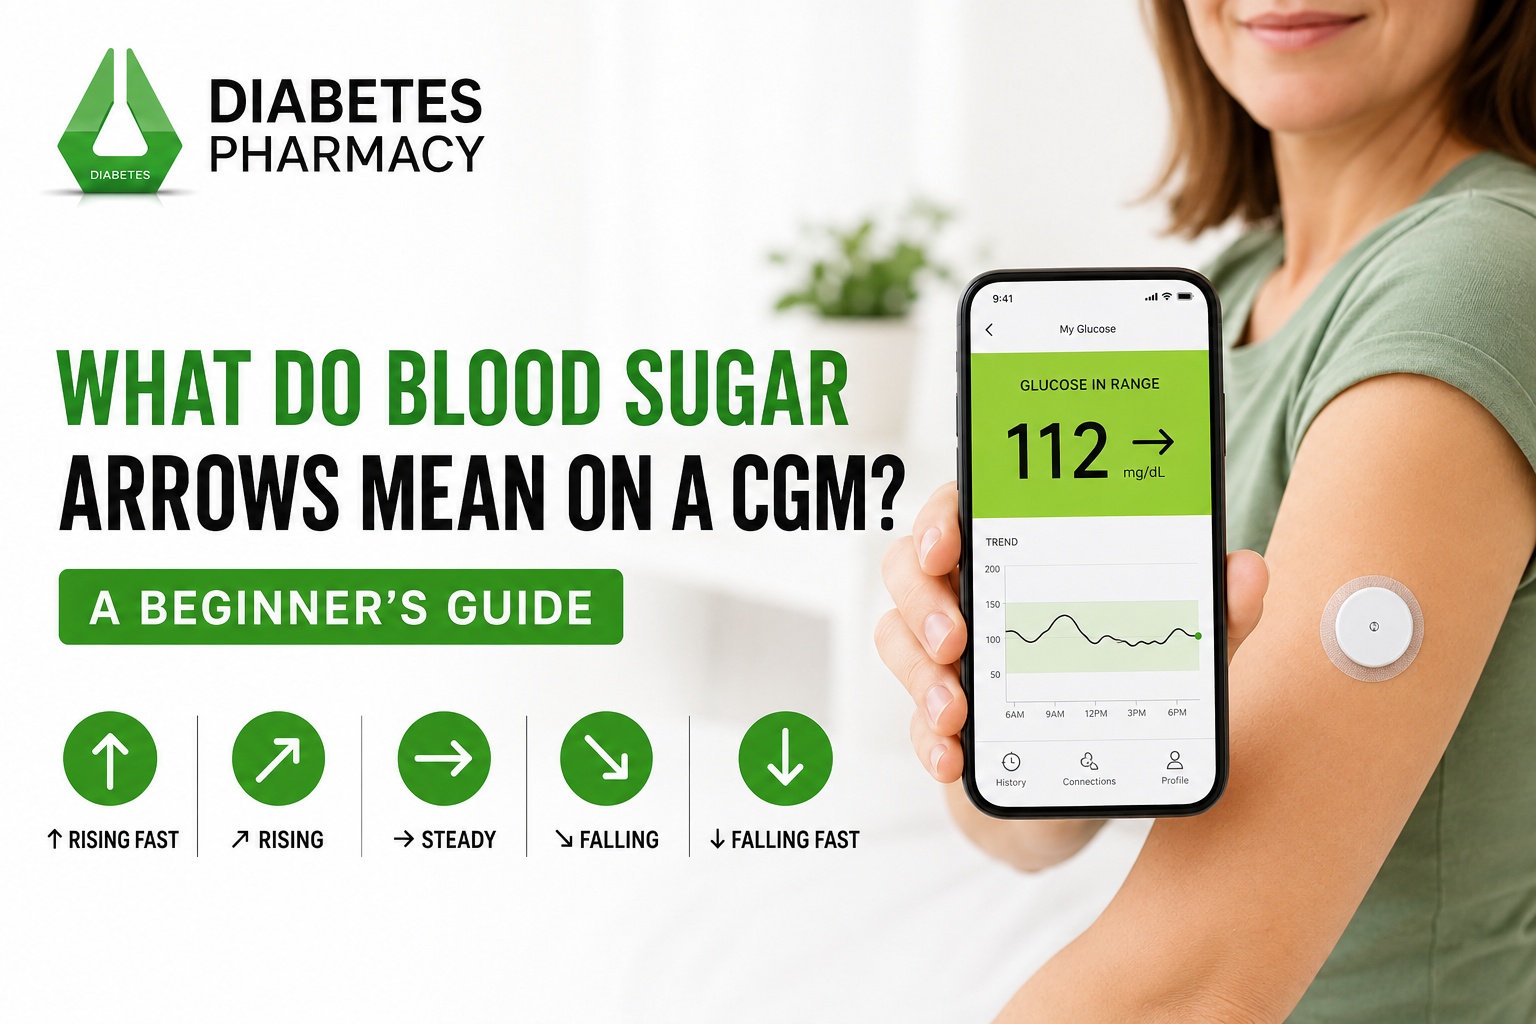
What Do Blood Sugar Arrows Mean on a CGM? A Beginner’s Guide

Continuous glucose monitors (CGMs) show more than your glucose number. They also display a trend arrow showing whether glucose is rising, falling, or staying relatively steady. These arrows provide useful context.

What Is a CGM Trend Arrow?

A CGM trend arrow is a visual indicator showing how your glucose level is changing. Exact symbols and meanings vary between CGM systems, so always check the instructions for your device.

Generally, a horizontal arrow means glucose is relatively stable. An upward arrow indicates rising glucose, while a downward arrow indicates falling glucose. Angled arrows may indicate moderate changes, while stronger arrows can indicate faster movement.

The number tells you where your glucose is now. The arrow gives an indication of where it may be heading.

Why Do Blood Sugar Arrows Matter?

A single glucose reading is only a snapshot. A trend arrow provides context by showing direction and may help you recognise developing highs or lows earlier.

For example, 150 mg/dL with a rising arrow may continue increasing, while the same reading with a falling arrow means glucose is moving downward.

Trend information can help you notice patterns linked with meals, exercise, medication, stress, or illness. Arrows should support your diabetes management plan, not replace professional advice.

Common CGM Arrow Meanings

Steady or horizontal arrow: Glucose is relatively stable or changing slowly.

Up arrow: Glucose is rising. A faster upward arrow generally means a quicker increase.

Down arrow: Glucose is falling. A faster downward arrow generally means a quicker decrease.

Angled upward arrow: Glucose is rising at a moderate rate.

Angled downward arrow: Glucose is falling at a moderate rate.

The exact rate represented by each arrow differs between devices. Never assume an arrow on one CGM means exactly the same rate on another.

How Should Beginners Read the Number and Arrow Together?

Start with the glucose number, then consider the arrow and your recent circumstances. Do not look at the arrow alone.

A reading within your target range with a steady arrow may indicate stability. A similar reading with a rising arrow tells a different story. A reading with a fast downward arrow may need closer attention, particularly if you use insulin or have experienced low glucose before.

Do not change insulin or other medication simply because an arrow appears. Follow the treatment plan provided by your diabetes healthcare team.

What Causes Glucose to Rise Quickly?

Meals containing carbohydrates can raise glucose, especially after larger portions. Stress, illness, reduced physical activity, missed medication, and some medicines can also affect glucose.

Your CGM can help identify repeated patterns. If you regularly see upward arrows after a particular meal, record what you ate and discuss the pattern with your healthcare professional. Avoid making treatment changes based on one reading.

What Causes Glucose to Fall Quickly?

Glucose can fall because of physical activity, insulin, diabetes medicines, delayed meals, alcohol, or other individual factors. A downward trend can therefore have different meanings.

If your CGM shows a rapid downward trend with low-glucose symptoms, follow your hypo treatment plan. If symptoms do not match the reading, confirm the result with a blood glucose meter when appropriate.

Using CGM Arrows Around Meals

After eating, glucose may rise before returning toward your usual range. Looking at the number, arrow, and timing together can help you understand your response to different foods.

You may notice different responses after different meals. Recording meals and CGM trends can reveal patterns over time.

Using CGM Arrows During Exercise

Exercise can affect glucose in different ways. Some activities may cause glucose to fall, while intense exercise can sometimes produce a temporary rise. The effect depends on insulin, food intake, duration, and intensity. A trend arrow provides context, but it should not be used alone to decide whether to exercise or change treatment. Follow your diabetes exercise plan and ask your healthcare team for guidance.

CGM Products Available at Diabetes Pharmacy

If you are considering a CGM, Diabetes Pharmacy offers diabetes monitoring products through its online store. Its current range includes Libre 2 Plus and Libre 3 Plus, along with diabetes-care supplies. The FreeStyle Libre 3 Plus product page states that it provides real-time glucose readings every minute, optional alerts, and up to 15 days of sensor wear.

The website also lists the FreeStyle Libre 2 sensor for monitoring interstitial glucose and trend information. Availability and specifications can change, so check product details and manufacturer instructions before purchasing.

Explore the range on the Diabetes Pharmacy homepage or review CGM product information. If unsure, speak to your diabetes healthcare professional.

Tips for Using CGM Arrows Safely

Learn the specific arrow meanings for your CGM model. Look at the glucose number and trend together. Consider recent meals, exercise, medication, and symptoms. Most importantly, follow your prescribed diabetes management plan.

CGMs measure glucose in interstitial fluid, so readings can sometimes differ from a blood glucose meter when glucose changes quickly. If a reading does not match how you feel, follow manufacturer and healthcare guidance about confirming it.

When Should You Seek Help?

Contact your healthcare professional about unexplained highs or lows, repeated rapid changes, or difficulty interpreting CGM data. Seek urgent help for severe hypoglycaemia symptoms, significant illness, or other concerning symptoms.

Conclusion

Blood sugar arrows make CGM data more useful by showing the direction and speed of glucose change, not just the current number. Beginners should read the glucose value, trend arrow, recent activity, and symptoms together. These arrows can help you recognise patterns and discuss them with your healthcare team.

Diabetes Pharmacy provides products such as Libre 2 Plus and Libre 3 Plus online. Choose a device based on your needs, compatibility, and professional guidance, and follow manufacturer instructions.

FAQs

  1. What does an upward arrow mean on a CGM?
    An upward arrow generally means glucose is rising. The speed depends on the CGM model and arrow type.

  2. What does a downward arrow mean on a CGM?
    A downward arrow means glucose is falling. A stronger downward arrow generally indicates a faster decrease.

  3. Can I change insulin because of a trend arrow?
    Do not change insulin or medication solely because of an arrow. Follow your prescribed treatment plan and ask your healthcare team for guidance.

  4. Do all CGMs use the same arrows?
    No. Arrow symbols and glucose-change rates can differ between CGM systems. Always check your device instructions.

  5. Where can I find CGM products in the UK?
    Diabetes Pharmacy offers CGM products and diabetes monitoring supplies online, including Libre 2 Plus and Libre 3 Plus. Check product details before ordering.
Share:

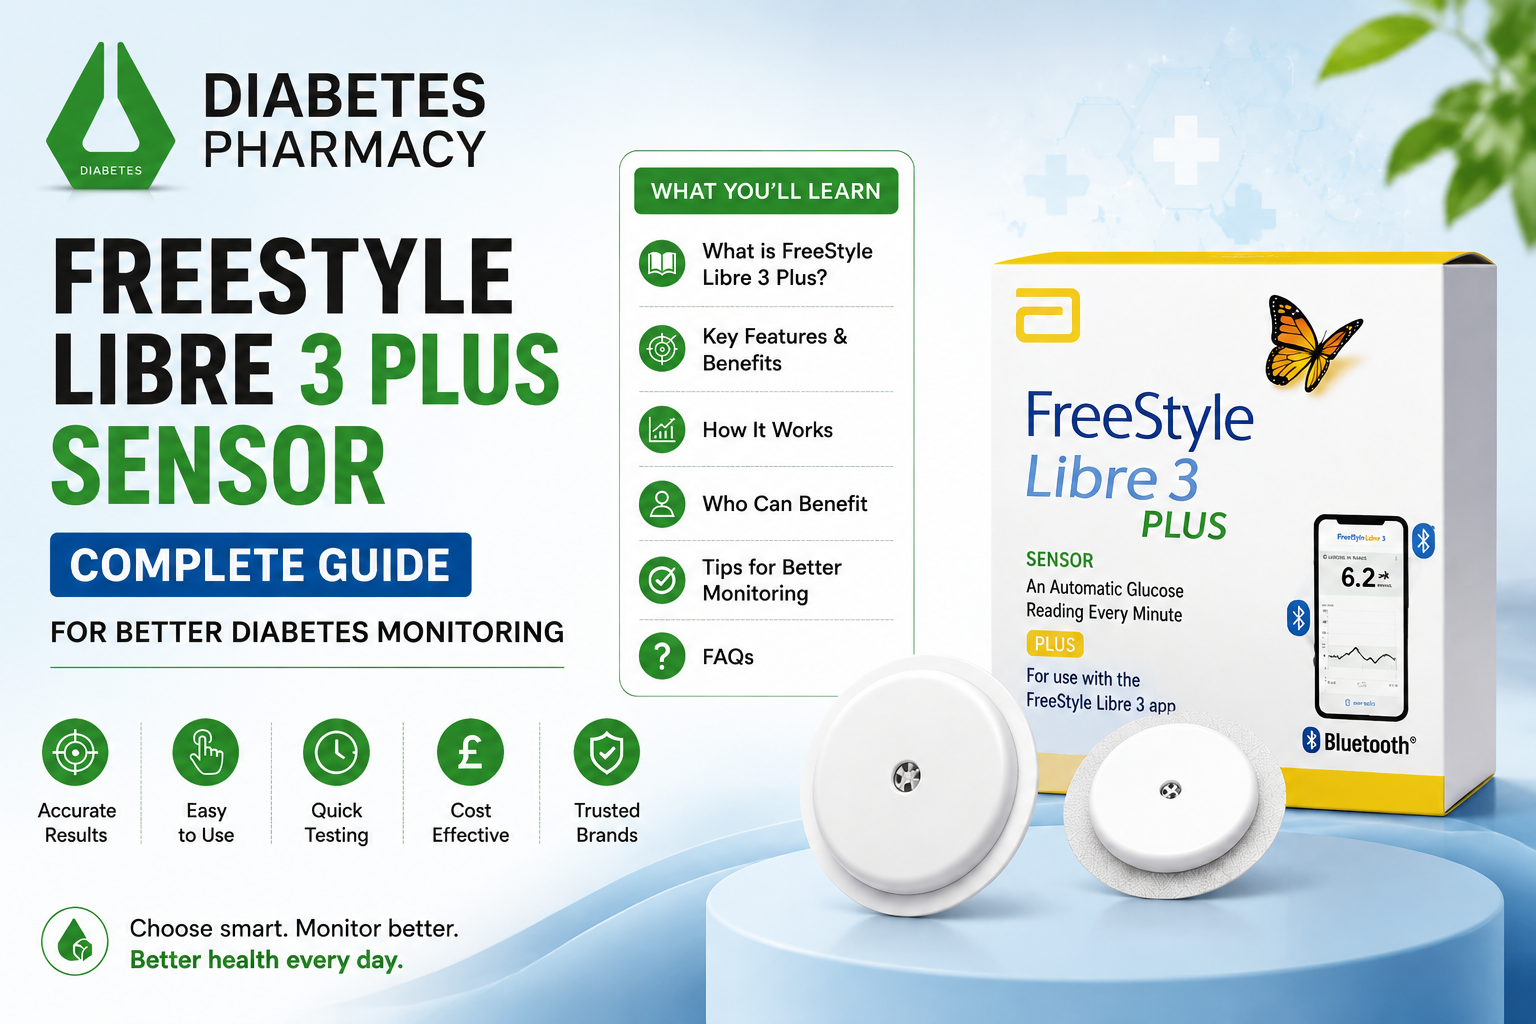
FreeStyle Libre 3 Plus Sensor: Complete Guide for Better Diabetes Monitoring

Managing diabetes requires regular monitoring, informed decisions, and consistent lifestyle management. Traditional blood glucose monitoring methods often require multiple finger-prick tests throughout the day, which can be uncomfortable and may not provide a complete picture of glucose changes. With advancements in healthcare technology, Continuous Glucose Monitoring (CGM) systems have transformed the way people track their blood sugar levels.

The FreeStyle Libre 3 Plus Sensor is one of the latest innovations designed to provide continuous glucose insights and support better diabetes management. It helps users understand their glucose patterns, identify trends, and make more informed decisions about diet, activity, and medication with the guidance of healthcare professionals.

At Diabetes Pharmacy, we focus on helping people access reliable diabetes management products and information that support better health outcomes. Understanding advanced monitoring solutions like FreeStyle Libre 3 Plus can help individuals take a more proactive approach toward managing diabetes.

What Is FreeStyle Libre 3 Plus Sensor?

The FreeStyle Libre 3 Plus Sensor is a Continuous Glucose Monitoring system that measures glucose levels continuously throughout the day. Unlike traditional blood glucose meters that provide readings only at specific testing times, CGM technology provides a broader view of glucose patterns.

The small sensor is placed on the skin and continuously measures glucose levels from the fluid under the skin. Users can view their glucose information through a compatible reader or smartphone application, allowing them to understand how their glucose changes during daily activities.

This technology helps reduce the need for frequent finger-prick testing and provides valuable insights into glucose trends, helping users and healthcare providers make better diabetes management decisions.

Key Features of FreeStyle Libre 3 Plus Sensor

The FreeStyle Libre 3 Plus Sensor comes with several advanced features designed to make glucose monitoring easier and more effective.

Continuous Glucose Monitoring

One of the biggest advantages of the FreeStyle Libre 3 Plus Sensor is continuous glucose tracking. Instead of checking glucose levels occasionally, users can monitor their glucose patterns throughout the day and night.

This helps identify important changes such as rising glucose levels after meals, overnight fluctuations, or changes caused by exercise and daily routines.

Real-Time Glucose Insights

The sensor provides updated glucose information, helping users understand their current glucose status and trends. These insights allow people to recognize patterns and discuss possible improvements with their healthcare professionals.

Improved Diabetes Management

Having access to detailed glucose information can support better diabetes management. Users can understand how different foods, physical activities, and lifestyle choices affect their glucose levels.

Comfortable and Convenient Design

The sensor is designed to be small, lightweight, and easy to wear. Its discreet design allows users to continue normal daily activities while monitoring glucose levels.

Benefits of Using FreeStyle Libre 3 Plus Sensor

Better Understanding of Glucose Patterns

Diabetes management is not only about knowing a single glucose reading. Understanding glucose patterns over time is equally important. The FreeStyle Libre 3 Plus Sensor helps users recognize trends and changes that may otherwise go unnoticed.

Reduces Frequent Finger-Prick Testing

Many people find traditional glucose testing inconvenient due to repeated finger-prick requirements. CGM systems provide a more convenient alternative by offering continuous monitoring through a sensor.

Supports Better Lifestyle Decisions

Glucose data can help users understand how meals, exercise, stress, and daily habits influence their glucose levels. This information can support healthier choices when combined with professional medical advice.

Helps Healthcare Discussions

Detailed glucose reports can provide useful information during medical consultations. Healthcare professionals can review glucose trends and suggest appropriate adjustments for diabetes care plans.

What Is FreeStyle Libre 3 Plus Sensor?

The FreeStyle Libre 3 Plus Sensor is a Continuous Glucose Monitoring system that measures glucose levels continuously throughout the day. Unlike traditional blood glucose meters that provide readings only at specific testing times, CGM technology provides a broader view of glucose patterns.

The small sensor is placed on the skin and continuously measures glucose levels from the fluid under the skin. Users can view their glucose information through a compatible reader or smartphone application, allowing them to understand how their glucose changes during daily activities.

This technology helps reduce the need for frequent finger-prick testing and provides valuable insights into glucose trends, helping users and healthcare providers make better diabetes management decisions.

The FreeStyle Libre 3 Plus Sensor works by measuring glucose levels from interstitial fluid beneath the skin. After applying the sensor, it continuously collects glucose data.

The sensor communicates with a compatible device, allowing users to view their glucose readings and trends. This information helps users understand whether glucose levels are increasing, decreasing, or remaining stable.

For the best results, users should follow the manufacturer’s instructions for sensor application, usage, and replacement. Healthcare guidance is also important for making treatment-related decisions.

Who Can Benefit From FreeStyle Libre 3 Plus?

The FreeStyle Libre 3 Plus Sensor may be beneficial for people who need better visibility into their glucose patterns. It can support individuals managing different types of diabetes, including those who require regular glucose monitoring.

People who experience frequent glucose fluctuations, want more detailed glucose information, or find traditional monitoring methods challenging may find CGM technology helpful.

However, diabetes management needs vary from person to person. Users should consult their healthcare provider to understand whether this technology is suitable for their individual needs.

Tips for Better Diabetes Monitoring With CGM Technology

Using a CGM system effectively requires more than simply checking glucose readings. Here are some important practices:

  • Review glucose trends regularly instead of focusing only on individual readings.
  • Maintain a balanced diet recommended by healthcare professionals.
  • Stay physically active according to personal health conditions.
  • Follow prescribed medications and treatment plans.
  • Share glucose reports with healthcare providers during consultations.
  • Maintain proper sensor care and follow usage instructions.

Technology works best when combined with healthy habits and professional medical guidance.

Why Choose Diabetes Pharmacy for Diabetes Care Solutions?

Finding reliable diabetes management products and accurate information is important for better healthcare decisions. Diabetes Pharmacy provides access to diabetes care solutions that help individuals manage their condition more effectively.

From glucose monitoring products to diabetes-related resources, Diabetes Pharmacy focuses on supporting people with convenient access to trusted healthcare solutions. The goal is to make diabetes management simpler, more informed, and more accessible.

Conclusion

The FreeStyle Libre 3 Plus Sensor represents an important advancement in diabetes monitoring technology. By providing continuous glucose insights, it helps users understand their glucose patterns and manage diabetes more effectively.

Better monitoring can lead to better awareness, improved conversations with healthcare providers, and more informed daily decisions. While technology plays an important role, successful diabetes management also depends on healthy lifestyle choices, regular medical guidance, and consistent care.

With reliable resources and diabetes management solutions from Diabetes Pharmacy, individuals can take meaningful steps toward achieving better control and improving their overall quality of life.

FAQs

1. What is FreeStyle Libre 3 Plus Sensor used for?
FreeStyle Libre 3 Plus Sensor is used for continuous glucose monitoring. It helps track glucose levels throughout the day and provides insights into glucose patterns.

2. Is FreeStyle Libre 3 Plus different from a blood glucose meter?
Yes. A blood glucose meter provides individual glucose readings through finger-prick testing, while FreeStyle Libre 3 Plus provides continuous glucose information and trends.

3. How does FreeStyle Libre 3 Plus help with diabetes management?
It helps users understand glucose patterns, identify changes, and make informed lifestyle decisions with healthcare guidance.

4. Can anyone with diabetes use FreeStyle Libre 3 Plus?
Suitability depends on individual health needs. People should consult their healthcare provider before starting any glucose monitoring system.

5. Where can I learn more about diabetes monitoring products?
You can explore trusted diabetes care resources and products through Diabetes Pharmacy for better diabetes management support.

Share:

How to Apply a FreeStyle Libre 2 Plus Sensor Correctly

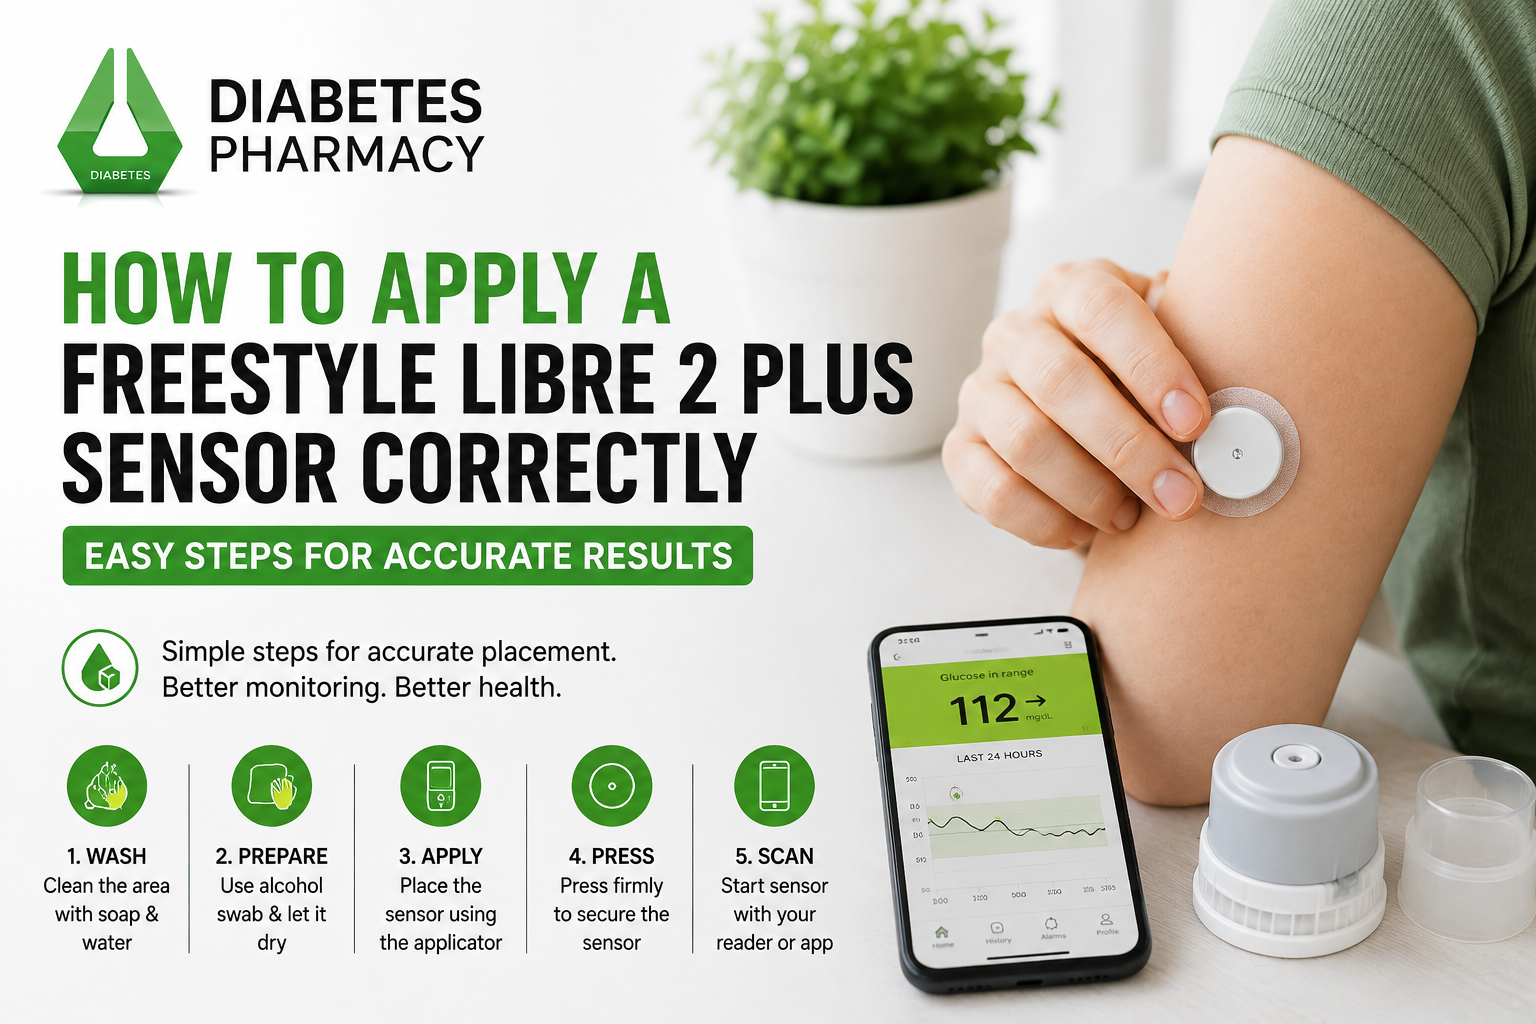
Applying a FreeStyle Libre 2 Plus sensor correctly can make glucose monitoring more comfortable. The sensor is designed for the back of the upper arm and can monitor glucose for up to 15 days. Before applying a new sensor, learn how to prepare your skin, use the applicator, start the sensor, and care for it afterwards. Follow the instructions supplied with your sensor carefully and speak with a healthcare professional if you are unsure.

What Is the FreeStyle Libre 2 Plus Sensor?

The FreeStyle Libre 2 Plus is a continuous glucose monitoring sensor that measures glucose in interstitial fluid. It works with compatible FreeStyle Libre systems, including the FreeStyle LibreLink app and Libre 2 reader. Abbott states that the sensor is designed for up to 15 days of wear and is applied to the back of the upper arm. 

Before using your sensor, check the manufacturer’s instructions and make sure your smartphone or reader is compatible. The correct setup can help you start monitoring smoothly and understand when the sensor is ready to use.

Choose the Right Application Site

Start by selecting a suitable area on the back of your upper arm. Abbott recommends choosing a site that stays flat during normal activity. Avoid areas that are irritated, scarred, damaged, or otherwise unsuitable for sensor application. 

It can also be helpful to rotate application areas between sensors so the skin has time to recover. Choose a location that feels comfortable and is less likely to be rubbed by clothing, bags, or frequent movement during the day

Clean and Prepare Your Skin

Skin preparation is an important part of sensor application. First, wash the selected area with non-moisturising, fragrance-free soap and water. Dry the skin thoroughly with a clean towel.

Next, use an alcohol wipe to clean the application area. Allow the skin to air dry completely before continuing. Do not apply the sensor while the skin is wet. 

Avoid putting creams, lotions, oils, or moisturisers on the application area immediately before applying the sensor, because they may affect how well the adhesive sticks to the skin.

Prepare the Sensor Applicator

The FreeStyle Libre 2 Plus sensor uses an applicator designed to place the sensor on the back of the upper arm. Abbott’s UK instructions explain that you should open the sensor pack and remove the cap from the applicator.

For the applicable two-part preparation process, line up the dark marks on the sensor applicator and sensor pack. Press the applicator down firmly until it stops, then lift it from the pack. Do not replace the cap after preparation because it could damage the sensor. 

Always use the instructions included with your particular product if they differ from general guidance.

Apply the Sensor

After preparing your skin and applicator, position the applicator over the selected area on the back of your upper arm. Press the applicator firmly against your skin.

You should hear a click when the sensor is applied. Wait for a few seconds, then slowly pull the applicator away from your arm, leaving the sensor attached to your skin. 

Once the applicator has been removed, check that the sensor is secure. Avoid repeatedly pressing, moving, or attempting to reposition the sensor after application.

Keep the Sensor Secure

Once the sensor is attached, take care during normal activities. Avoid deliberately pulling, knocking, or scratching the sensor. Be careful when changing clothes because clothing can sometimes catch on the adhesive.

Exercise and sweating may affect how well an adhesive stays attached, particularly when there is repeated friction. If you use an additional adhesive patch, choose one designed for sensor use and follow its instructions.

Check the sensor regularly during everyday activities. If it becomes loose or falls off, follow the manufacturer’s support guidance instead of trying to reattach it yourself.

Common Application Mistakes to Avoid

Several simple mistakes can affect application. Applying a sensor to damp skin, using moisturiser immediately beforehand, or selecting irritated skin can reduce adhesion.

Another mistake is rushing the preparation process. Allowing the alcohol-cleaned skin to air dry completely gives you a better surface for application.

Do not touch the inside of the applicator or try to modify the sensor. Never reuse a sensor or applicator. If the sensor appears damaged before application, do not use it and contact the appropriate support service.

Why Choose Diabetes Pharmacy?

Choosing a reliable source for diabetes monitoring supplies can make managing your routine more convenient. Diabetes Pharmacy offers a range of diabetes care and monitoring products, including FreeStyle Libre 2 Plus and other diabetes essentials. The website also provides UK delivery and customer support to help customers find suitable products.

Conclusion

Applying a FreeStyle Libre 2 Plus sensor correctly involves choosing a suitable site, cleaning and drying the skin, preparing the applicator carefully, and pressing it firmly onto the back of the upper arm. Starting the sensor correctly and allowing the required warm-up period are also important.

Following the manufacturer’s instructions can make sensor application easier and more comfortable. If you need diabetes monitoring supplies or information about glucose monitoring products, a trusted Diabetes Pharmacy can help you explore suitable options for your routine.

Frequently Asked Questions

1. Where should I apply a FreeStyle Libre 2 Plus sensor?
The sensor should be applied to the back of the upper arm, using a suitable site that stays flat during normal activity and follows the manufacturer’s application guidance.

2. Should I clean my skin before applying the sensor?
Yes. Clean the area with non-moisturising, fragrance-free soap and water, then use an alcohol wipe and allow the skin to air dry completely before application.

3. How long does the FreeStyle Libre 2 Plus take to start?
The sensor has a one-hour warm-up period before it can be used to check glucose, according to Abbott’s UK guidance. 

4. How long can a FreeStyle Libre 2 Plus sensor be worn?
The FreeStyle Libre 2 Plus sensor is designed to be worn for up to 15 days. 

5. What should I do if my sensor falls off?
If the sensor falls off, follow Abbott’s support guidance rather than trying to reattach it yourself. Contact the manufacturer or your healthcare professional if you need further assistance.

Share:

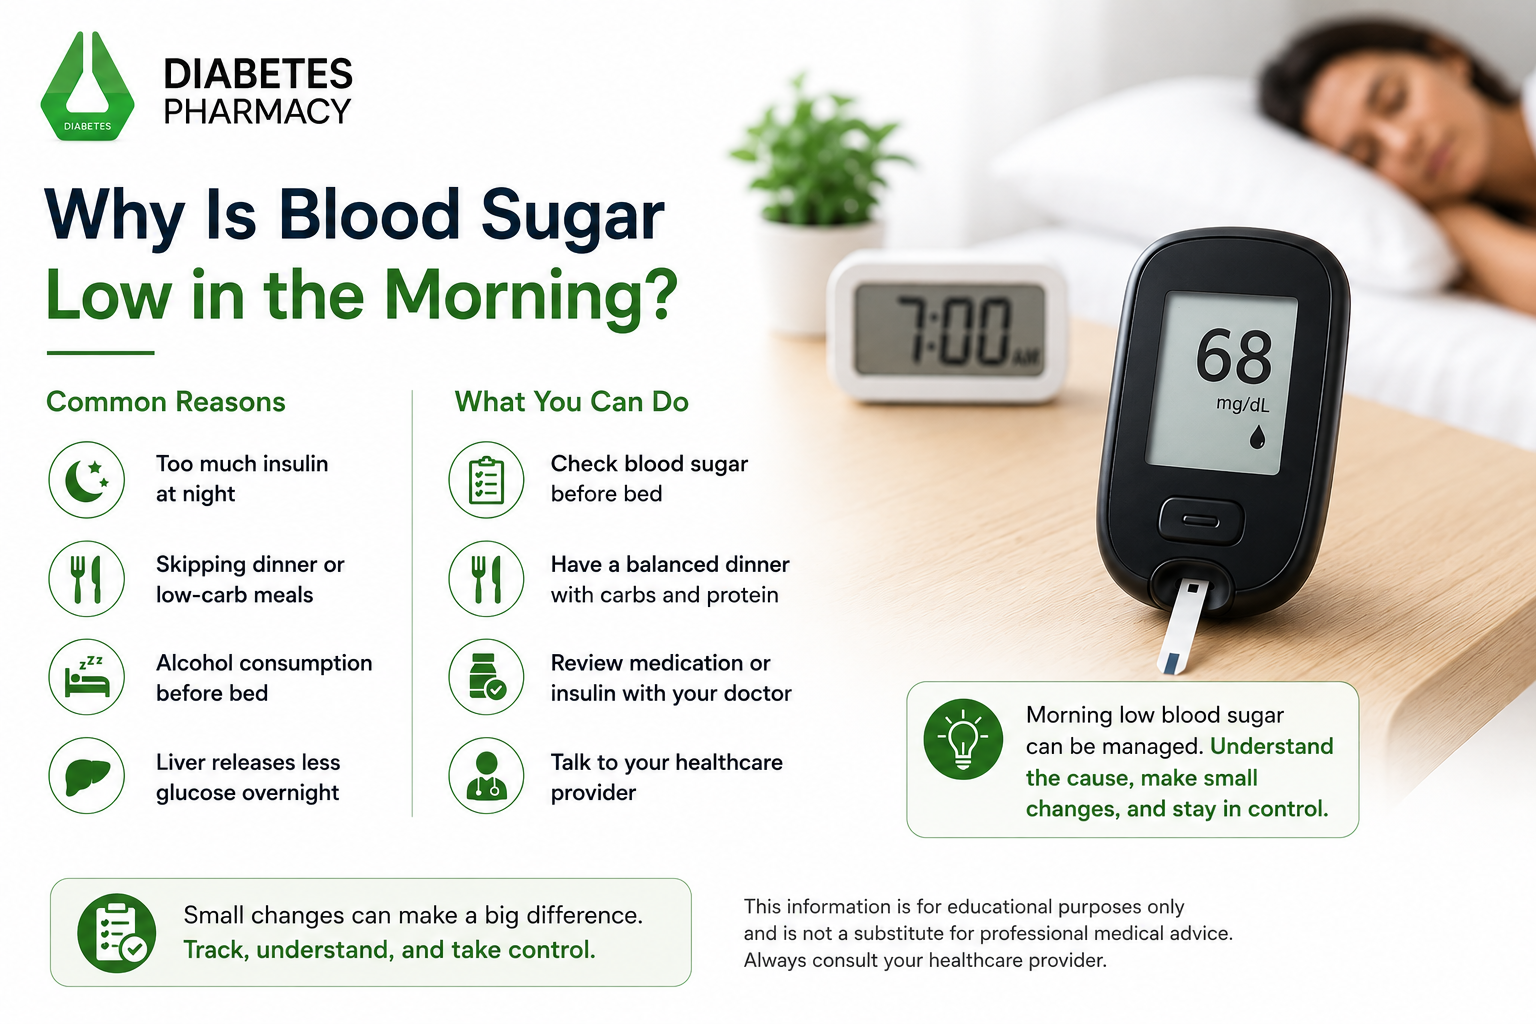
Why Is Blood Sugar Low in the Morning? Causes & Tips

Morning blood sugar levels tend to fluctuate even in people without diabetes. Your blood sugar levels may be impacted by the timing and type of meals, your medication, physical activity, alcohol consumption, and overall sleep. If you want to control your diabetes, you must understand why blood sugar decreases while you sleep.

What Is Low Blood Sugar?

Low blood sugar, also known as hypoglycaemia, occurs when glucose levels fall below the range recommended for you. For many people with diabetes, a blood glucose level below 4 mmol/L is considered low, although individual circumstances and treatment plans can vary.

Low blood sugar may cause symptoms such as sweating, shaking, hunger, dizziness, weakness, confusion, or a fast heartbeat. Severe hypoglycaemia can be dangerous and requires urgent attention.

Why do I have Low Blood Sugar in the Morning?

There are multiple explanations for waking up with low blood sugar. If you wish to know the answer, you need to track your meals, record your blood sugar levels, log your activities, and tell your doctor about any changes in your medication.

Insulin

There are various insulins and medications that stimulate the production of insulin. Most of these drugs cause a drop in blood sugars. If you take your insulin, and food at a different time than your medication, or at a time that doesn’t satisfy your overnight blood sugar needs, your blood sugar will eventually bottom out.

Your medication should never be self adjusted.

Not Eating Enough

Eating a smaller dinner than usual, skipping dinner, or eating fewer carbohydrates than usual can lead to a decrease in blood sugar levels during the night regardless if you use blood sugar-lowering medication or not.

Morning hypoglycemia episodes are a reason to reach out to your healthcare provider.

Increased Physical Activity

Exercise influences your sugar levels for several hours post activity. Evening exercise may lead to a continued decrease in your glucose levels during the night.

The reason for evening physical activity pattern and morning hypoglycemia should be discussed with healthcare professional.

Alcohol Consumption

Alcohol inhibits the liver’s release of stored energy into the bloodstream. Combining late night alcohol consumption and lack of food increases the risk for low blood sugar during the night and in the following morning.

For diabetes and the impact of alcohol on your glucose levels and medication, speak with your healthcare professional.

Changes in Your Routine

Travel, changes in schedule and routine, illness, etc. can negatively impact blood glucose. Even a small change in your schedule can impact overnight glucose levels.

Make note of any changes in your schedule.

How Can You Tell If Your Blood Sugar Is Low Overnight?

Some individuals with hypoglycemia have symptoms that cause them to wake up in the middle of the night, while others do not experience any symptoms overnight.

Some signs are waking up with a headache, unusual fatigue, shaking, confusion, or feeling dizzy. However, these signs can mean other things, so checking with your glucose meter or monitoring system with the recommendation from your healthcare provider can give you important information.

If you are suspecting lows throughout the night on a regular basis, you should discuss it with your healthcare team. They may tell you to check your glucose at certain times or may encourage you to use a continuous glucose monitoring system to learn about the overnight pattern.

What Should You Do If Your Morning Blood Sugar Is Low?

If your glucose reading is below your recommended range, follow the hypoglycaemia treatment plan provided by your healthcare professional.

For many people with diabetes, a low blood glucose level is treated with a fast-acting source of carbohydrate, followed by another check after the recommended period. However, your treatment plan may be different depending on your circumstances.

If you become severely confused, unconscious, have a seizure, or cannot safely swallow, this is an emergency. Those around you should follow the emergency plan provided by your healthcare team and seek urgent medical assistance.

How Can You Track Morning Blood Sugar Patterns?

Keeping a simple record can help you and your healthcare team understand why morning glucose may be low. Consider recording your bedtime glucose reading, morning glucose reading, evening meals and snacks, physical activity, medication timing, alcohol consumption, and any symptoms experienced overnight.

If you regularly monitor your glucose levels, a reliable meter can help you keep track of your readings. The GlucoRx Q Blood Glucose Monitoring System is available from Diabetes Pharmacy and can be used for blood glucose testing.

Looking at several days of information can be more useful than focusing on one isolated reading.

When Should You Speak to a Healthcare Professional?

It is expected to have some variability in blood sugar levels and as such, you should not worry about morning blood sugar readings that are just under your target range. However, having low blood sugar levels in the morning many times is something you should not ignore, and you should speak to your healthcare provider. This becomes even more important when you notice symptoms in the night and you are not sure how to safely change your routine.

Your healthcare team will be able to evaluate your medication, meals, activity, glucose levels, and your current routine. Once they assess these factors, they will provide you advice most relevant to you.

Conclusion

Low blood sugar in the morning can have several possible causes, including diabetes medication, insufficient food intake, evening exercise, alcohol, and changes in your normal routine. Tracking your readings and daily activities can help reveal patterns.

If morning lows happen regularly, speak with your healthcare professional rather than changing medication on your own. A trusted Diabetes Pharmacy can also provide information about glucose meters, monitoring supplies, and other diabetes care products.

FAQs

1. What is considered low blood sugar?
For many people with diabetes, blood glucose below 4 mmol/L is considered low. Your healthcare professional can confirm the appropriate threshold and action plan for you.

2. Can skipping dinner cause low blood sugar in the morning?
It can, particularly for people using certain diabetes medicines or insulin. If you regularly experience morning lows, discuss your eating pattern and treatment with your healthcare professional.

3. Can exercise cause low blood sugar overnight?
Yes. Physical activity can continue to affect glucose levels for several hours, so evening exercise may contribute to overnight or morning lows in some people.

4. Why do I wake up sweating when my blood sugar is low?
Sweating can be a symptom of hypoglycaemia. If you regularly wake with sweating or other symptoms, check your glucose when appropriate and discuss the pattern with your healthcare team.

5. Should I change my diabetes medication if my morning blood sugar is low?
Do not change your medication dose yourself. Repeated low readings should be discussed with your healthcare professional, who can determine whether your treatment needs adjustment.

Share:

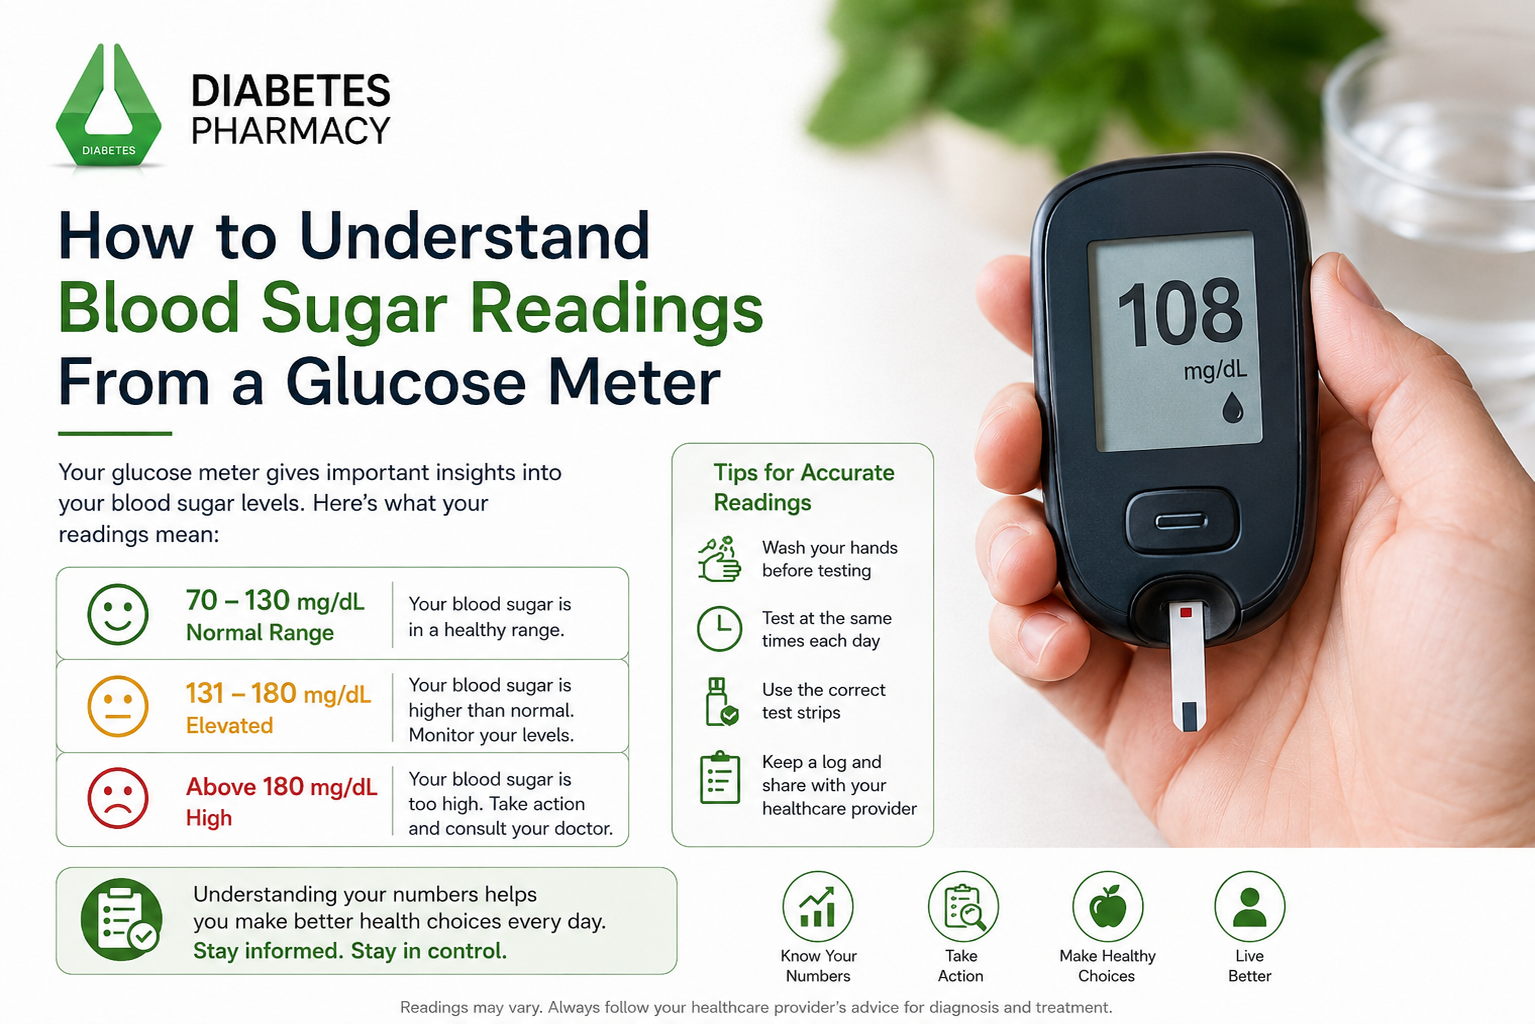
How to Understand Blood Sugar Readings From a Glucose Meter

Understanding blood sugar readings from a glucose meter can make diabetes monitoring easier and help you recognise patterns in your glucose levels. A glucose meter measures the amount of glucose in a small blood sample, usually taken from your fingertip, and displays the result in mmol/L in the UK. However, a number on the screen is most useful when you understand when it was taken and what may have affected it.

What Is a Glucose Meter?

A glucose meter, also called a blood glucose meter or blood sugar meter, is a portable device used to check glucose levels. It normally works with disposable test strips and a lancing device. After a small blood sample is placed on the strip, the meter provides a reading within seconds.

Your healthcare professional can advise you on how often to test and which readings are useful for you. Always follow the instructions with your meter, and ask a healthcare professional if you are unsure how to use it or interpret results correctly and safely.

What Does a Blood Sugar Reading Mean?

A blood sugar reading tells you how much glucose is present in your blood at a specific moment. It does not show your average glucose level over several weeks or months. This is why individual readings are best considered alongside your testing routine and longer-term measures such as HbA1c.

Blood glucose naturally changes throughout the day because of food, activity, medication, stress, illness and sleep.

Why Does Testing Time Matter?

The timing of your test can affect the result. A reading taken before a meal may differ from one taken after eating because food, particularly carbohydrate-containing foods, can raise blood glucose.

If you have been advised to monitor your blood sugar, make a note of when each reading was taken. You may record whether it was before a meal, after a meal, before or after physical activity, at bedtime, or at another recommended time.

Consistent testing times can make patterns easier to identify.

What Can Affect Blood Sugar Readings?

Several everyday factors can cause your blood sugar to rise or fall.

Food and Drinks

Meals and snacks, particularly those containing carbohydrates, can affect glucose levels.

Physical Activity

Exercise can change blood glucose levels. If you have been advised to check glucose around exercise, follow your healthcare team’s guidance.

Stress and Sleep

Stress and poor sleep can also influence glucose levels and daily routines.

Illness and Medication

Illness and some medicines can affect blood glucose. Never change or stop prescribed medication based only on a glucose meter reading unless advised by a healthcare professional.

How to Recognise Blood Sugar Patterns

Looking at a series of readings can be more useful than focusing on one number. You might notice that your glucose is regularly higher after a particular meal or changes after certain activities.

A simple record can include the date, time, reading, meals, activity, medication where relevant, and unusual factors such as stress or illness. This information can help you discuss recurring patterns with your healthcare team.

Your personal target range may differ from someone else’s. Ask your healthcare professional what range is appropriate for you rather than relying on a general number online.

What If Your Reading Looks Unexpected?

An unexpected reading does not always mean that your blood glucose has suddenly changed. Testing technique and equipment can also affect results.

Before testing, wash and dry your hands thoroughly. Follow the instructions for your glucose meter and use compatible test strips. Check that strips have been stored correctly and have not passed their expiry date.

If a result seems unusual, follow the manufacturer’s instructions about repeating the test. If unexpected or concerning readings continue, contact your healthcare professional or pharmacist for advice.

Why Is Keeping a Record Helpful?

A blood sugar diary can help you and your healthcare team understand how glucose changes over time. Regular records can make repeated patterns easier to spot and may help identify situations worth discussing with a professional.

If your meter stores results automatically, check whether it can display trends or transfer information to a compatible app. A written record can also be useful.

Choosing a Glucose Meter

If you need a glucose meter, consider features that fit your daily routine. Useful points to compare include display size, amount of blood required, testing speed, memory capacity, ease of use, and the availability and cost of compatible test strips and lancets.

Some meters can transfer readings to a smartphone, which may be useful for digital records.

A trusted Diabetes Pharmacy can help you explore suitable blood glucose monitoring products and understand which features may be useful for your needs.

When Should You Seek Professional Advice?

Speak with your healthcare professional if your readings are repeatedly outside the range you have been given, if you are unsure how to interpret results, or if you experience concerning symptoms.

If you feel seriously unwell or have severe symptoms associated with very high or very low blood glucose, seek urgent medical help. Do not make significant changes to your diabetes treatment based on internet information or a single meter reading.

Conclusion

Understanding blood sugar readings from a glucose meter is about more than checking the number on the screen. Testing time, meals, exercise, stress, illness, medication and testing technique can all influence results. Keeping a record can help you identify patterns and give your healthcare team useful information.

If you are unsure about your readings or monitoring device, speak with a healthcare professional or trusted Diabetes Pharmacy. A consistent monitoring routine can make a glucose meter a practical part of diabetes care.

FAQs

1. What does a glucose meter measure?
A glucose meter measures the amount of glucose in a small blood sample and displays the result, usually in mmol/L in the UK.

2. Why can blood sugar readings change during the day?
Blood glucose can change because of meals, physical activity, stress, sleep, illness, medication and other individual factors.

3. What is the normal blood sugar range?
There is no single target for everyone with diabetes. Recommended ranges depend on individual circumstances and should be discussed with your healthcare professional.

4. Why should I record my glucose readings?
Recording readings can help you identify patterns and provide useful information for conversations with your healthcare team.

5. What should I do if my meter gives an unusual reading?
Check your hands, test strip, meter instructions and strip storage conditions. If unusual readings continue or you feel unwell, contact a healthcare professional for advice.

Share:

How to Choose the Right Blood Sugar Meter at Boots

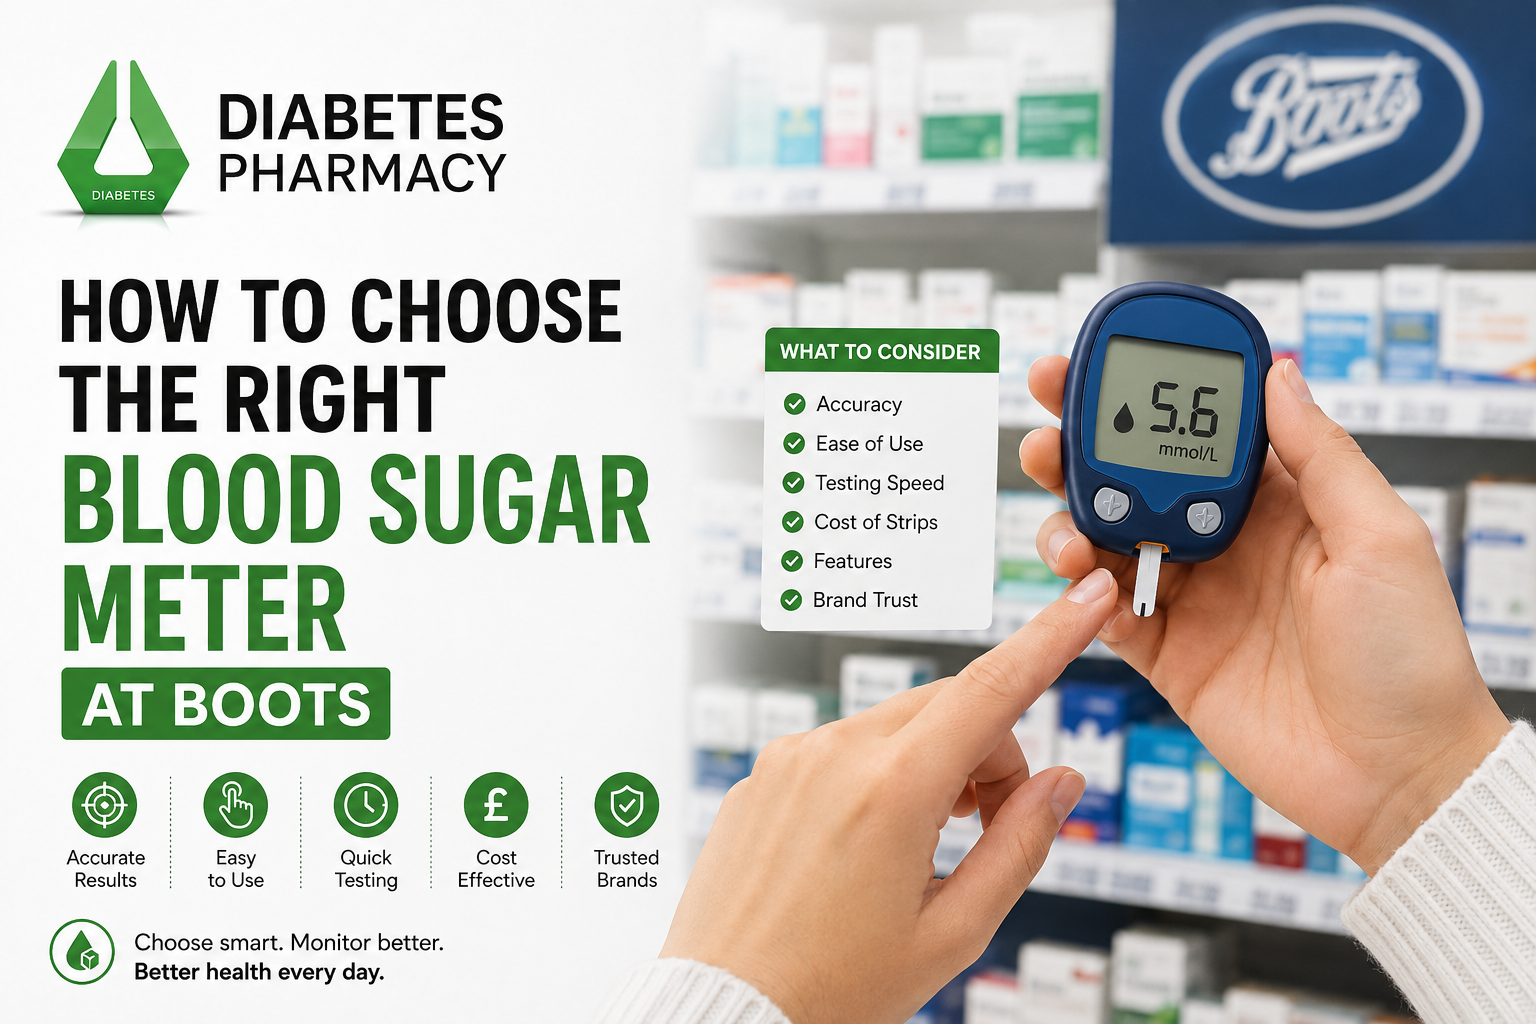
Choosing the right blood sugar meter can make regular glucose testing easier, more comfortable, and affordable. When comparing a blood sugar meter at Boots, it’s important to consider accuracy, ease of use, test-strip costs, features, and long-term availability. This guide covers the key factors to help you compare popular options and choose a meter that fits your daily diabetes care needs.

Why the Right Meter Matters

A blood glucose meter is not something you purchase just once. You will also need test strips and lancets regularly, and some meters may connect with a mobile app for easier record keeping. Choosing the right meter can make a difference to your daily testing experience.

A reliable meter can provide accurate glucose readings that help you understand how food, exercise, and treatment may affect your blood sugar levels. Comfort is also important, especially if you need to test several times a day. The meter should be easy to hold, operate, and read.

Ongoing costs are another important consideration. While the meter itself may be affordable, replacement strips and lancets can become a regular expense. It is also useful to choose a meter that makes it easy to store and review your readings so you can identify patterns over time.

Regular blood glucose monitoring can support better day to day diabetes management. Taking time to choose a meter that suits your testing routine, comfort needs, and budget can make regular monitoring much easier.

Key Factors to Consider

Before comparing specific products, it helps to know which features actually matter for day-to-day use.

Factor

Why it matters

Cost per test

The strip or cassette price, not the meter price, is what you’ll pay for years. A cheap meter with expensive strips can cost more overall.

Blood sample size

A smaller sample (measured in microlitres) generally means a less painful, easier test — useful if you test often.

Testing speed

Most modern meters give a result in 4–10 seconds, but this can matter if you’re testing in public or in a hurry.

Memory & averaging

Meters that store readings and calculate 7, 14 or 30-day averages make it easier to spot trends between GP visits.

App or Bluetooth connectivity

Useful if you or your diabetes team want to review results digitally, but relies on having your phone to hand.

Meal markers

The ability to tag a reading as “before” or “after” a meal, on the meter itself, makes the data far easier to interpret later.

Ease of handling

Larger buttons, backlit screens and simple strip loading matter if dexterity or eyesight are a concern.

NHS prescription eligibility

Some meters and their strips are listed in the Drug Tariff, meaning your GP can prescribe them rather than you buying them each time.

Blood Sugar Meters Available at Boots

At the time of writing, Boots stocks a small range of meters, from a value own-brand kit through to Accu-Chek’s more advanced systems. Prices and stock can change, so always check current pricing on boots.com or in store.

Meter

Typical price

What’s in the box

Approx. cost per test

Boots Blood Glucose Monitoring System

£19.99

Meter, 10 test strips, 10 lancets, lancing device, control solution, case

~£0.34 (50-pack strips £16.99)

Accu-Chek® Instant

£34.99

Meter, 10 test strips, FastClix finger pricker, 2 lancet drums (12 lancets)

~£0.42 (50-pack strips £20.99)

Accu-Chek® Mobile

Varies by bundle

Meter using a 50-test cassette rather than loose strips

~£0.48 (50-test cassette £23.99)

Accu-Chek® Guide / Guide Me

Premium tier

Meter, lancing device, strips — no-coding system with mySugr app support

Similar to Instant strip pricing

Prices are indicative and correct at the time of research; always confirm current pricing on boots.com before buying.

If your Boots meter takes a different strip, it’s worth double-checking compatibility before you buy in bulk, our guide on how to choose the right blood glucose test strips for your meter walks through the common mistakes people make. Popular strip and lancet ranges you may come across include Accu-Chek Aviva test strips, Accu-Chek Active test strips, Bayer Contour Plus test strips, OneTouch Verio test strips, the Accu-Chek FastClix lancing device, and GlucoRx sterile lancets. If a Boots-bought meter isn’t the right fit, the GlucoRx Nexus Blood Glucose Monitoring System Kit is another all-in-one kit worth comparing, with a large backlit display and a lower entry price.

If you decide fingerstick testing isn’t giving you the picture you need, it’s also worth knowing that continuous glucose monitors such as the FreeStyle Libre 2 Plus and FreeStyle Libre 3 Plus are available as a needle-free alternative that tracks glucose automatically throughout the day and night.

Working Out the True Cost of a Meter

The price on the box is really the price of the meter plus a small sample of strips  usually only 10. At one test a day, ten strips last a week and a half; for anyone testing before and after meals, they can be gone in two or three days. To compare meters fairly, it helps to work out the cost of a few months of testing, not just the starter kit.

As a rough example, based on around 200 tests (roughly seven to eight months of regular testing):

Item

Boots own-brand

Accu-Chek Instant

Starter kit (10 strips)

£19.99

£34.99

Additional strips (≈190 more, in 50-packs)

≈£64.60

≈£79.76

Lancets (separate cost)

From a few pounds for a pack of 100

FastClix refills from ~£15 for 102

Approximate running total

≈£85–£90

≈£130–£150

This isn’t a reason to automatically pick the cheapest option  accuracy, comfort and features matter too,  but it’s worth doing this sum before deciding, especially if you’ll be testing multiple times a day. If you’d rather order strips, lancets and control solution together and have them delivered, you can compare current prices in the Diabetes Pharmacy shop.

Practical Tips for Choosing at Boots

  • Ask the Boots pharmacist for guidance on choosing a suitable meter and check whether NHS prescription options are available. Choose a device that is easy to read and use, especially if you have eyesight or dexterity concerns. Consider app connectivity if you want digital tracking, and always compare the ongoing cost and availability of test strips and lancets. For more diabetes care advice, read our guide on key challenges in diabetes care and how to manage them better.

Conclusion

Choosing the right blood sugar meter involves more than comparing prices. Consider accuracy, ease of use, test-strip availability, features, and ongoing costs before making your choice. A suitable meter can make regular glucose testing simpler and more convenient. If you need help choosing the right diabetes monitoring products, a trusted Diabetes Pharmacy can help you explore suitable options and make an informed decision.

FAQs

How do I choose the right blood sugar meter?
Consider accuracy, ease of use, display, testing speed, memory, test-strip availability, and ongoing costs.

  1. Are blood sugar meters available at Boots?
    Yes, Boots offers different blood glucose monitoring products, including blood glucose meters, test strips, and lancets
  2. What should I look for in a blood sugar meter?
    Look for a meter that is simple to operate, provides reliable readings, requires a small blood sample, and has affordable, readily available test strips.
  3. How often should I use a blood sugar meter?
    Testing frequency varies depending on your diabetes type, treatment, and healthcare professional’s advice.
  4. Are blood sugar meters better than CGMs?
    They work differently. A blood sugar meter provides a reading from a finger-prick blood sample, while a CGM continuously measures glucose using a sensor. The right option depends on individual needs and clinical advice.
Share:

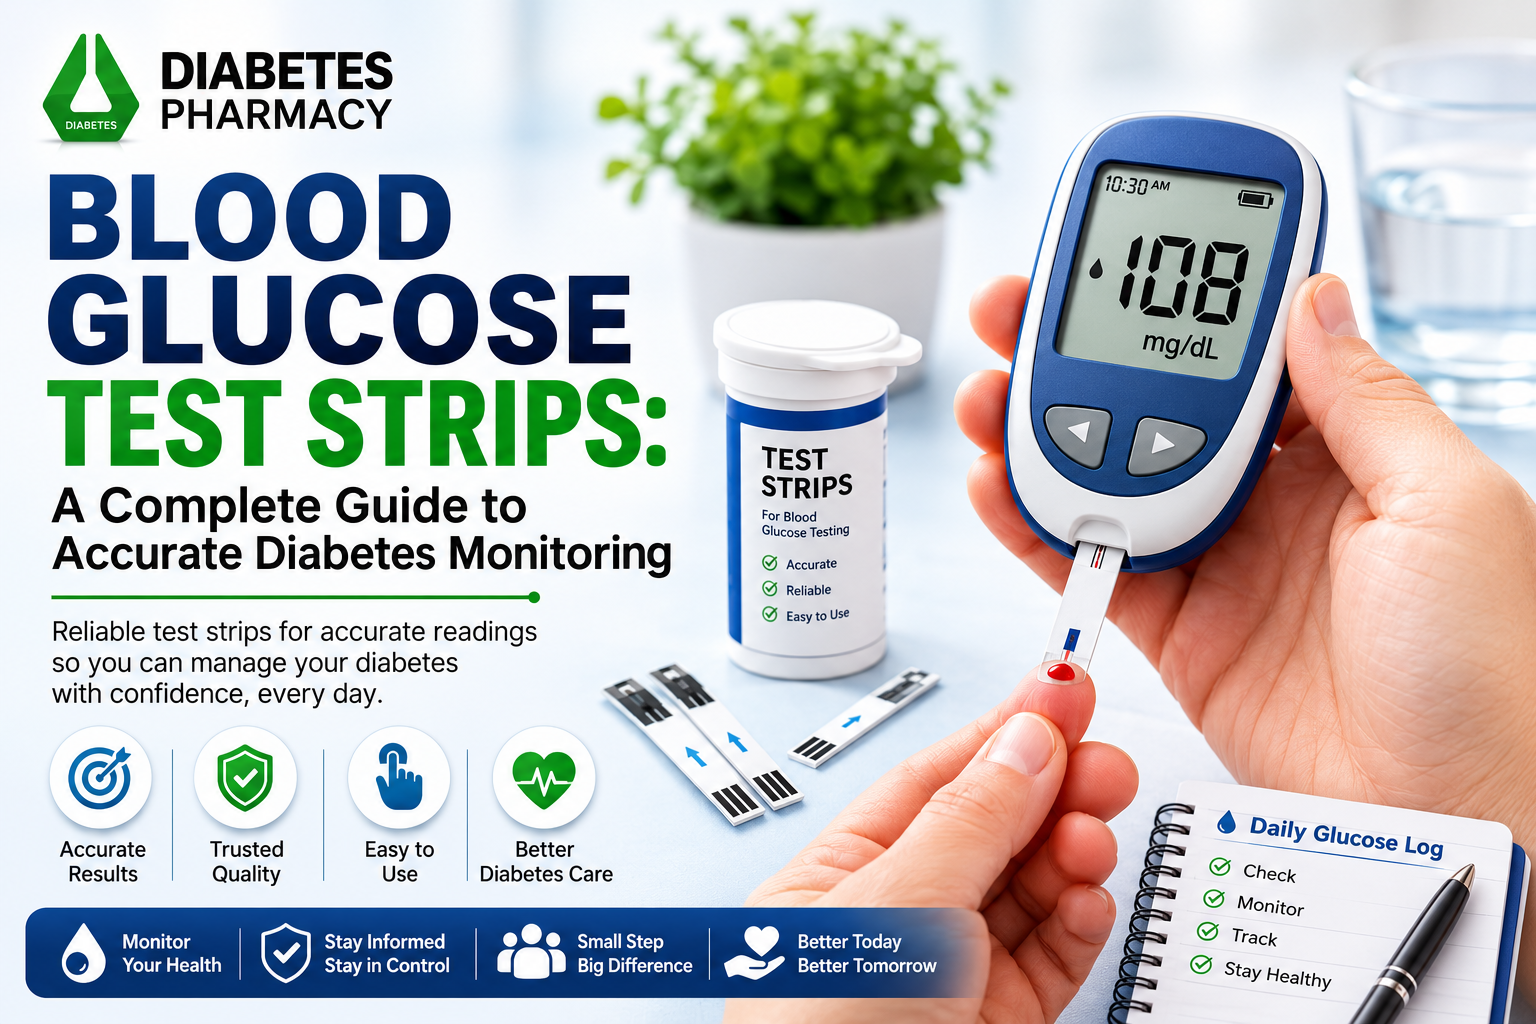
Blood Glucose Test Strips: A Complete Guide to Accurate Diabetes Monitoring

Managing diabetes effectively begins with regular blood glucose monitoring. Among the most essential tools for people living with diabetes are blood glucose test strips. These small but powerful strips work alongside a blood glucose meter to provide fast and accurate blood sugar readings, helping individuals make informed decisions about their daily diabetes management.

Whether you’re newly diagnosed or have been managing diabetes for years, understanding how test strips work and how to use them correctly is essential for maintaining healthy blood glucose levels.

In this guide, we’ll cover everything you need to know about blood glucose test strips, including their purpose, benefits, proper usage, storage, and tips for choosing the right strips.

What Are Blood Glucose Test Strips?

Blood glucose test strips are thin, disposable strips designed to measure the amount of glucose in a small blood sample. They are used together with a compatible blood glucose meter to provide a quick blood sugar reading.

Each strip contains special chemicals that react with glucose in the blood. Once the strip is inserted into the glucose meter and a small blood sample is applied, the meter analyzes the reaction and displays the blood glucose level within seconds.

Test strips play a vital role in daily diabetes care by helping users monitor blood sugar levels accurately and consistently.

Why Are Blood Glucose Test Strips Important?

Regular blood glucose testing allows individuals to understand how their body responds to food, physical activity, medication, stress, and illness.

Using test strips regularly can help:

  • Monitor daily blood glucose levels
  • Track changes over time
  • Support treatment decisions
  • Help identify high or low blood sugar
  • Encourage healthier lifestyle choices
  • Assist healthcare providers in evaluating diabetes management

Routine testing is an important part of an overall diabetes care plan.

How Do Blood Glucose Test Strips Work?

Blood glucose test strips use an enzyme that reacts with glucose in the blood sample.

The process is simple:

  1. Insert the test strip into a compatible glucose meter.
  2. Use a lancing device to obtain a small drop of blood.
  3. Touch the edge of the strip to the blood sample.
  4. The strip absorbs the blood automatically.
  5. The glucose meter analyzes the sample.
  6. Your blood glucose reading appears on the display within a few seconds.

Modern test strips require only a tiny blood sample and provide fast, reliable results.

Benefits of Using Blood Glucose Test Strips

Accurate Blood Sugar Monitoring

High-quality test strips provide reliable readings that help users make informed decisions regarding meals, exercise, and medication.

Quick Results

Most glucose meters display results in just 5–10 seconds, making testing convenient anytime during the day.

Easy to Use

Modern test strips are designed for simple, hassle-free testing with minimal blood samples.

Portable and Convenient

Test strips are lightweight and easy to carry, making it simple to monitor blood sugar at home, work, school, or while traveling.

Supports Better Diabetes Management

Consistent monitoring helps users recognize blood sugar patterns and work with healthcare professionals to improve diabetes management.

Types of Blood Glucose Test Strips

Although all test strips serve the same basic purpose, different brands and meters use different strip technologies.

Common types include:

Standard Blood Glucose Test Strips

Designed for traditional finger-prick blood glucose testing.

No Coding Test Strips

These strips eliminate manual coding, reducing the risk of user error and making testing more convenient.

High-Accuracy Test Strips

Designed with advanced technology to improve testing accuracy and consistency.

Alternate Site Testing Strips

Some systems allow blood samples from areas other than the fingertip, depending on the manufacturer’s recommendations.

How to Use Blood Glucose Test Strips Correctly

For accurate results, follow these steps:

Step 1: Wash Your Hands

Clean your hands with soap and warm water before testing.

Step 2: Prepare the Meter

Insert a compatible test strip into your blood glucose meter.

Step 3: Use a Lancing Device

Obtain a small blood sample from your fingertip.

Step 4: Apply Blood

Touch the edge of the strip to the blood drop.

Step 5: Read the Result

Wait for the glucose meter to display your blood sugar level.

Step 6: Record the Reading

Keep a log of your results or use your meter’s memory or connected mobile app if available.

Tips for Accurate Blood Glucose Testing

To improve testing accuracy:

  • Wash and dry your hands before testing.
  • Use only compatible test strips.
  • Check the expiration date before use.
  • Store strips properly.
  • Use sufficient blood as instructed.
  • Avoid touching the testing area of the strip.
  • Close the test strip container immediately after removing a strip.

Following the manufacturer’s instructions helps ensure reliable readings.

How to Store Blood Glucose Test Strips

Proper storage is essential for maintaining accuracy.

Store your test strips:

  • In their original container
  • In a cool, dry place
  • Away from direct sunlight
  • Away from excessive heat or humidity
  • With the container tightly closed
  • Away from bathrooms or kitchens where moisture levels may be high

Never use expired or damaged test strips, as they may provide inaccurate results.

Choosing the Right Blood Glucose Test Strips

When selecting test strips, consider:

Meter Compatibility

Always purchase strips specifically designed for your glucose meter model.

Accuracy

Choose products from reputable manufacturers known for quality and reliability.

Ease of Use

Look for strips that require a small blood sample and provide fast results.

Availability

Choose strips that are readily available for convenient replacement.

Cost

Compare prices while ensuring quality and compatibility with your meter.

Choose the Right Blood Glucose Monitoring Solution

Selecting the right diabetes monitoring product depends on your healthcare needs, lifestyle, and compatibility with your glucose monitoring system. Many users prefer advanced continuous glucose monitoring solutions such as FreeStyle Libre 2, FreeStyle Libre 3, and Dexcom products for their reliable performance and ease of use. These trusted diabetes care solutions can help support regular glucose monitoring when used according to the manufacturer’s instructions and your healthcare provider’s guidance. Before purchasing any monitoring device or test strips, always ensure they are compatible with your existing system and meet your individual diabetes management needs.

Conclusion

Blood glucose test strips remain an essential tool for accurate diabetes monitoring, helping users check glucose levels and better understand daily blood sugar patterns. Using compatible, properly stored test strips and following the correct testing technique can support more reliable readings. A trusted diabetes pharmacy can help provide blood glucose test strips, meters, and other diabetes monitoring supplies for consistent everyday management.

FAQs

  1. What are blood glucose test strips used for?
    Blood glucose test strips are used with a blood glucose meter to measure blood sugar levels from a small blood sample.
  2. Can I use any test strip with my glucose meter?
    No. Test strips are designed for specific glucose meter models. Always use the strips recommended by the meter manufacturer.
  3. How long do blood glucose test strips last?
    Test strips have an expiration date printed on the packaging. Always check the date before use and discard expired strips.
  4. Why is proper storage important?
    Heat, humidity, and direct sunlight can affect the accuracy of test strips. Proper storage helps maintain their performance.
  5. How often should I test my blood sugar?
    The frequency depends on your diabetes treatment plan and your healthcare provider’s recommendations. Some people may test multiple times a day, while others may need less frequent testing.
Share:

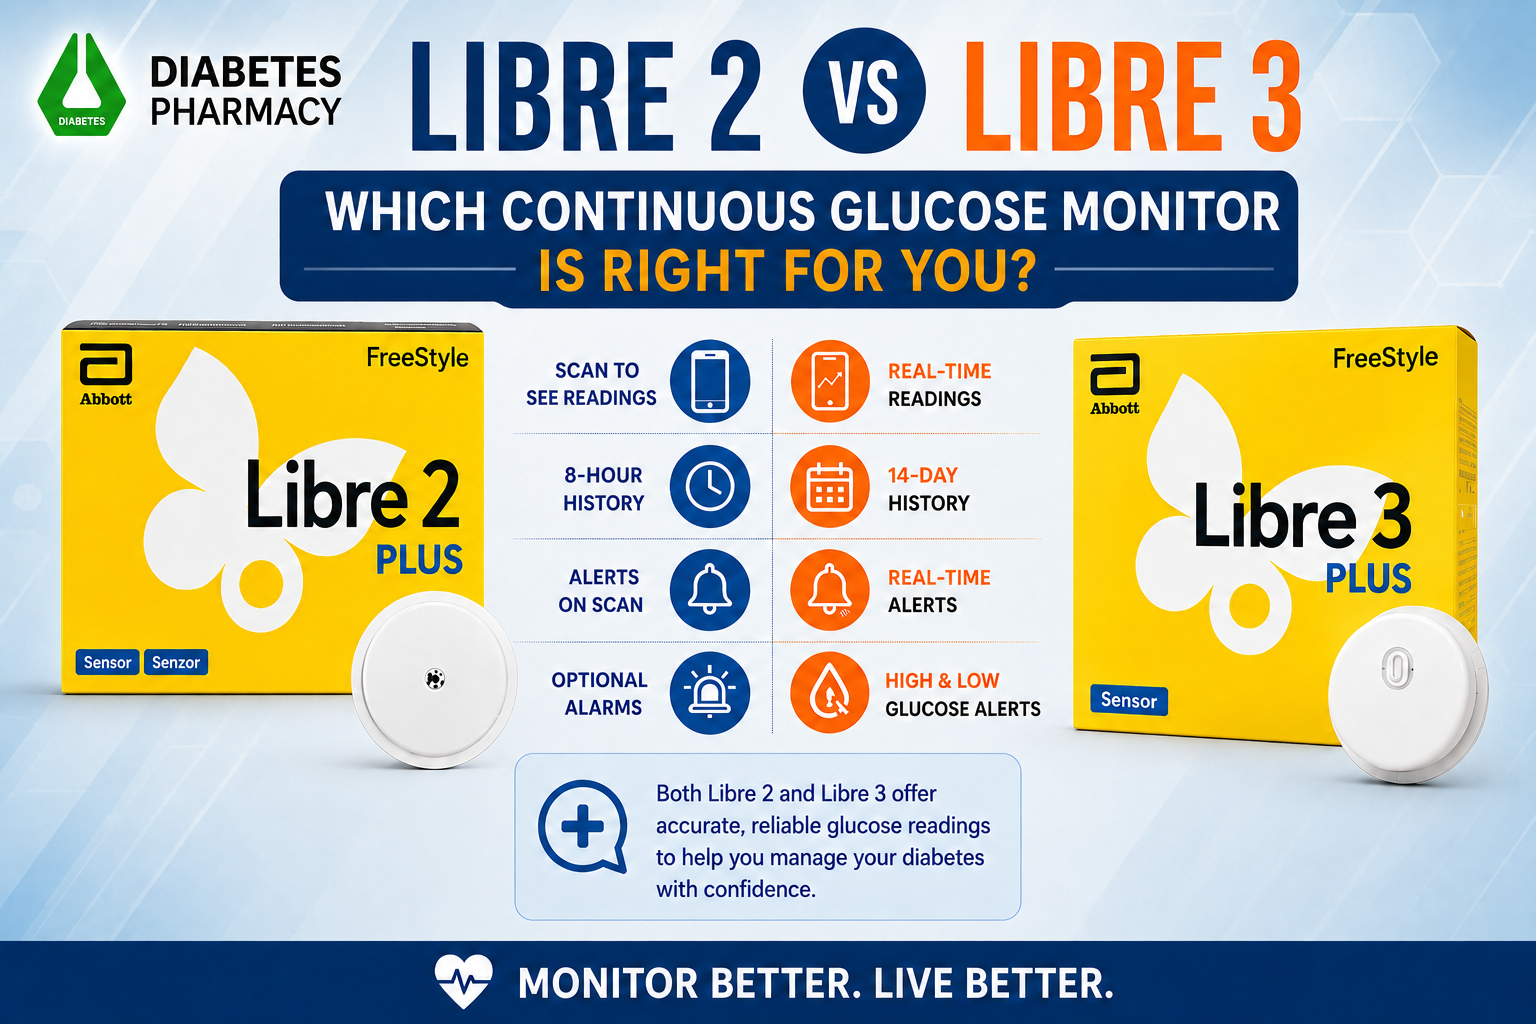
Libre 2 vs Libre 3: Which Continuous Glucose Monitor Is Right for You?

Managing diabetes has become easier thanks to Continuous Glucose Monitoring (CGM) technology. Instead of relying on frequent finger-prick tests, CGM devices provide real-time glucose readings throughout the day and night, helping users make informed decisions about their health.

Among the most popular CGM systems are the FreeStyle Libre 2 and FreeStyle Libre 3. Both are designed to simplify blood glucose monitoring, but they offer different features and benefits.

If you’re wondering which device is the better choice, this guide compares Libre 2 and Libre 3 to help you decide

What Is a Continuous Glucose Monitor?

A Continuous Glucose Monitor (CGM) is a wearable device that measures glucose levels in the fluid beneath your skin. A small sensor is placed on the back of the upper arm and tracks glucose levels continuously.

Benefits include:

  • Real-time glucose monitoring
  • Fewer finger-prick tests
  • Better understanding of glucose trends
  • High and low glucose alerts
  • Improved diabetes management

Libre 2 Overview

FreeStyle Libre 2 is a reliable CGM system that allows users to monitor glucose levels with a quick scan using a compatible reader or smartphone.

Key Features

  • 14-day sensor wear
  • Optional high and low glucose alarms
  • Easy smartphone compatibility
  • Accurate glucose readings
  • Water-resistant sensor
  • Small and comfortable design

Best For

  • First-time CGM users
  • People looking for dependable glucose monitoring
  • Users comfortable scanning the sensor when needed

Libre 2 vs Libre 3 Comparison

FeatureLibre 2Libre 3
Sensor Wear14 Days14 Days
Glucose UpdatesScan RequiredAutomatic Every Minute
High & Low AlertsYesYes
Sensor SizeSmallSmaller
Smartphone CompatibleYesYes
Finger PricksMinimal*Minimal*
BluetoothAlerts OnlyContinuous Data
Ease of UseExcellentOutstanding

Major Differences

1. Real-Time Monitoring

The biggest improvement with Libre 3 is automatic glucose updates.

Libre 2

  • Requires scanning the sensor to view current glucose.

Libre 3

  • Continuously sends readings directly to your phone every minute.

Winner: Libre 3

2. Sensor Size

Libre 3 features Abbott’s smallest sensor.

Benefits include:

  • More discreet
  • More comfortable
  • Easier to wear during daily activities

Winner: Libre 3

3. Convenience

Libre 2 works well, but users must remember to scan.

Libre 3 removes this extra step, making glucose monitoring almost effortless.

Winner: Libre 3

4. Alerts

Both systems provide customizable:

  • High glucose alerts
  • Low glucose alerts
  • Signal loss notifications

Result: Tie

5. Accuracy

Both systems deliver highly accurate glucose readings.

Libre 3 includes improvements in sensor technology, making it one of Abbott’s most accurate CGM systems.

Winner: Libre 3

Who Should Choose Libre 2?

Libre 2 may be ideal if you:

  • Prefer a proven CGM system
  • Don’t mind scanning occasionally
  • Want dependable glucose monitoring
  • Are transitioning from finger-prick testing

Who Should Choose Libre 3?

Libre 3 is an excellent option if you:

  • Want automatic glucose updates
  • Prefer hands-free monitoring
  • Value maximum convenience
  • Need frequent glucose tracking
  • Want the latest CGM technology

Benefits of Continuous Glucose Monitoring

One of the biggest benefits of blood sugar monitoring is understa

Whether you choose Libre 2 or Libre 3, CGM technology offers several advantages:

  • Better glucose control
  • Fewer finger-prick tests
  • Real-time glucose insights
  • Better understanding of trends
  • Reduced risk of unexpected highs and lows
  • More confidence in managing diabetes
  • Improved quality of life

nding how different foods impact your body.

Consider monitoring:

  • Before meals
  • One to two hours after meals

You may discover that certain foods cause larger glucose spikes than expected.

Common factors that influence blood sugar include:

  • Portion sizes
  • Carbohydrate intake
  • Fibre content
  • Protein consumption
  • Meal timing

Over time, monitoring helps you make more informed food choices.

Tips for Getting the Most from Your CGM

To maximize your device’s performance:

  • Apply the sensor to clean, dry skin.
  • Replace sensors on schedule.
  • Enable glucose alerts.
  • Review glucose trends regularly.
  • Follow your healthcare provider’s recommendations.
  • Keep your smartphone app updated.

Which One Should You Choose?

If you want a reliable, easy-to-use CGM at a lower cost, Libre 2 remains an excellent choice.

However, if you prefer automatic real-time glucose readings, a smaller sensor, and greater convenience, Libre 3 is the better option. Its continuous data transmission makes diabetes management easier without the need for manual scanning.

Both systems are excellent tools for improving diabetes care. The best choice depends on your lifestyle, preferences, and your healthcare provider’s recommendation.

Conclusion

Continuous Glucose Monitoring has transformed diabetes management, offering greater convenience and better insight into glucose levels than traditional finger-prick testing alone.

At Diabetes Pharmacy, we’re committed to helping you manage diabetes with confidence. We offer a wide range of trusted Continuous Glucose Monitors (CGMs), including Libre 2, Libre 3, sensors, test strips, lancets, and other essential diabetes care products. Explore our quality diabetes supplies and choose the solution that best supports your journey toward better health. 

Frequently Asked Questions

1. What is the main difference between Libre 2 and Libre 3?

Libre 2 requires you to scan the sensor to see your glucose level, while Libre 3 automatically sends glucose readings to your smartphone every minute.

2. How long does each sensor last?

Both Libre 2 and Libre 3 sensors are designed to be worn for up to 14 days.

3. Does Libre 3 require finger-prick tests?

Most users can manage without routine finger-prick testing, though finger-stick checks may still be needed in certain situations as recommended by the manufacturer or healthcare provider.

4. Is Libre 3 more accurate than Libre 2?

Both systems are highly accurate, but Libre 3 incorporates updated sensor technology and offers improved overall performance.

5. Which CGM is better for beginners?

Libre 2 is a great introduction to CGM technology, while Libre 3 is ideal for users who want a more automated and convenient monitoring experience.

Share:
Add to cart